
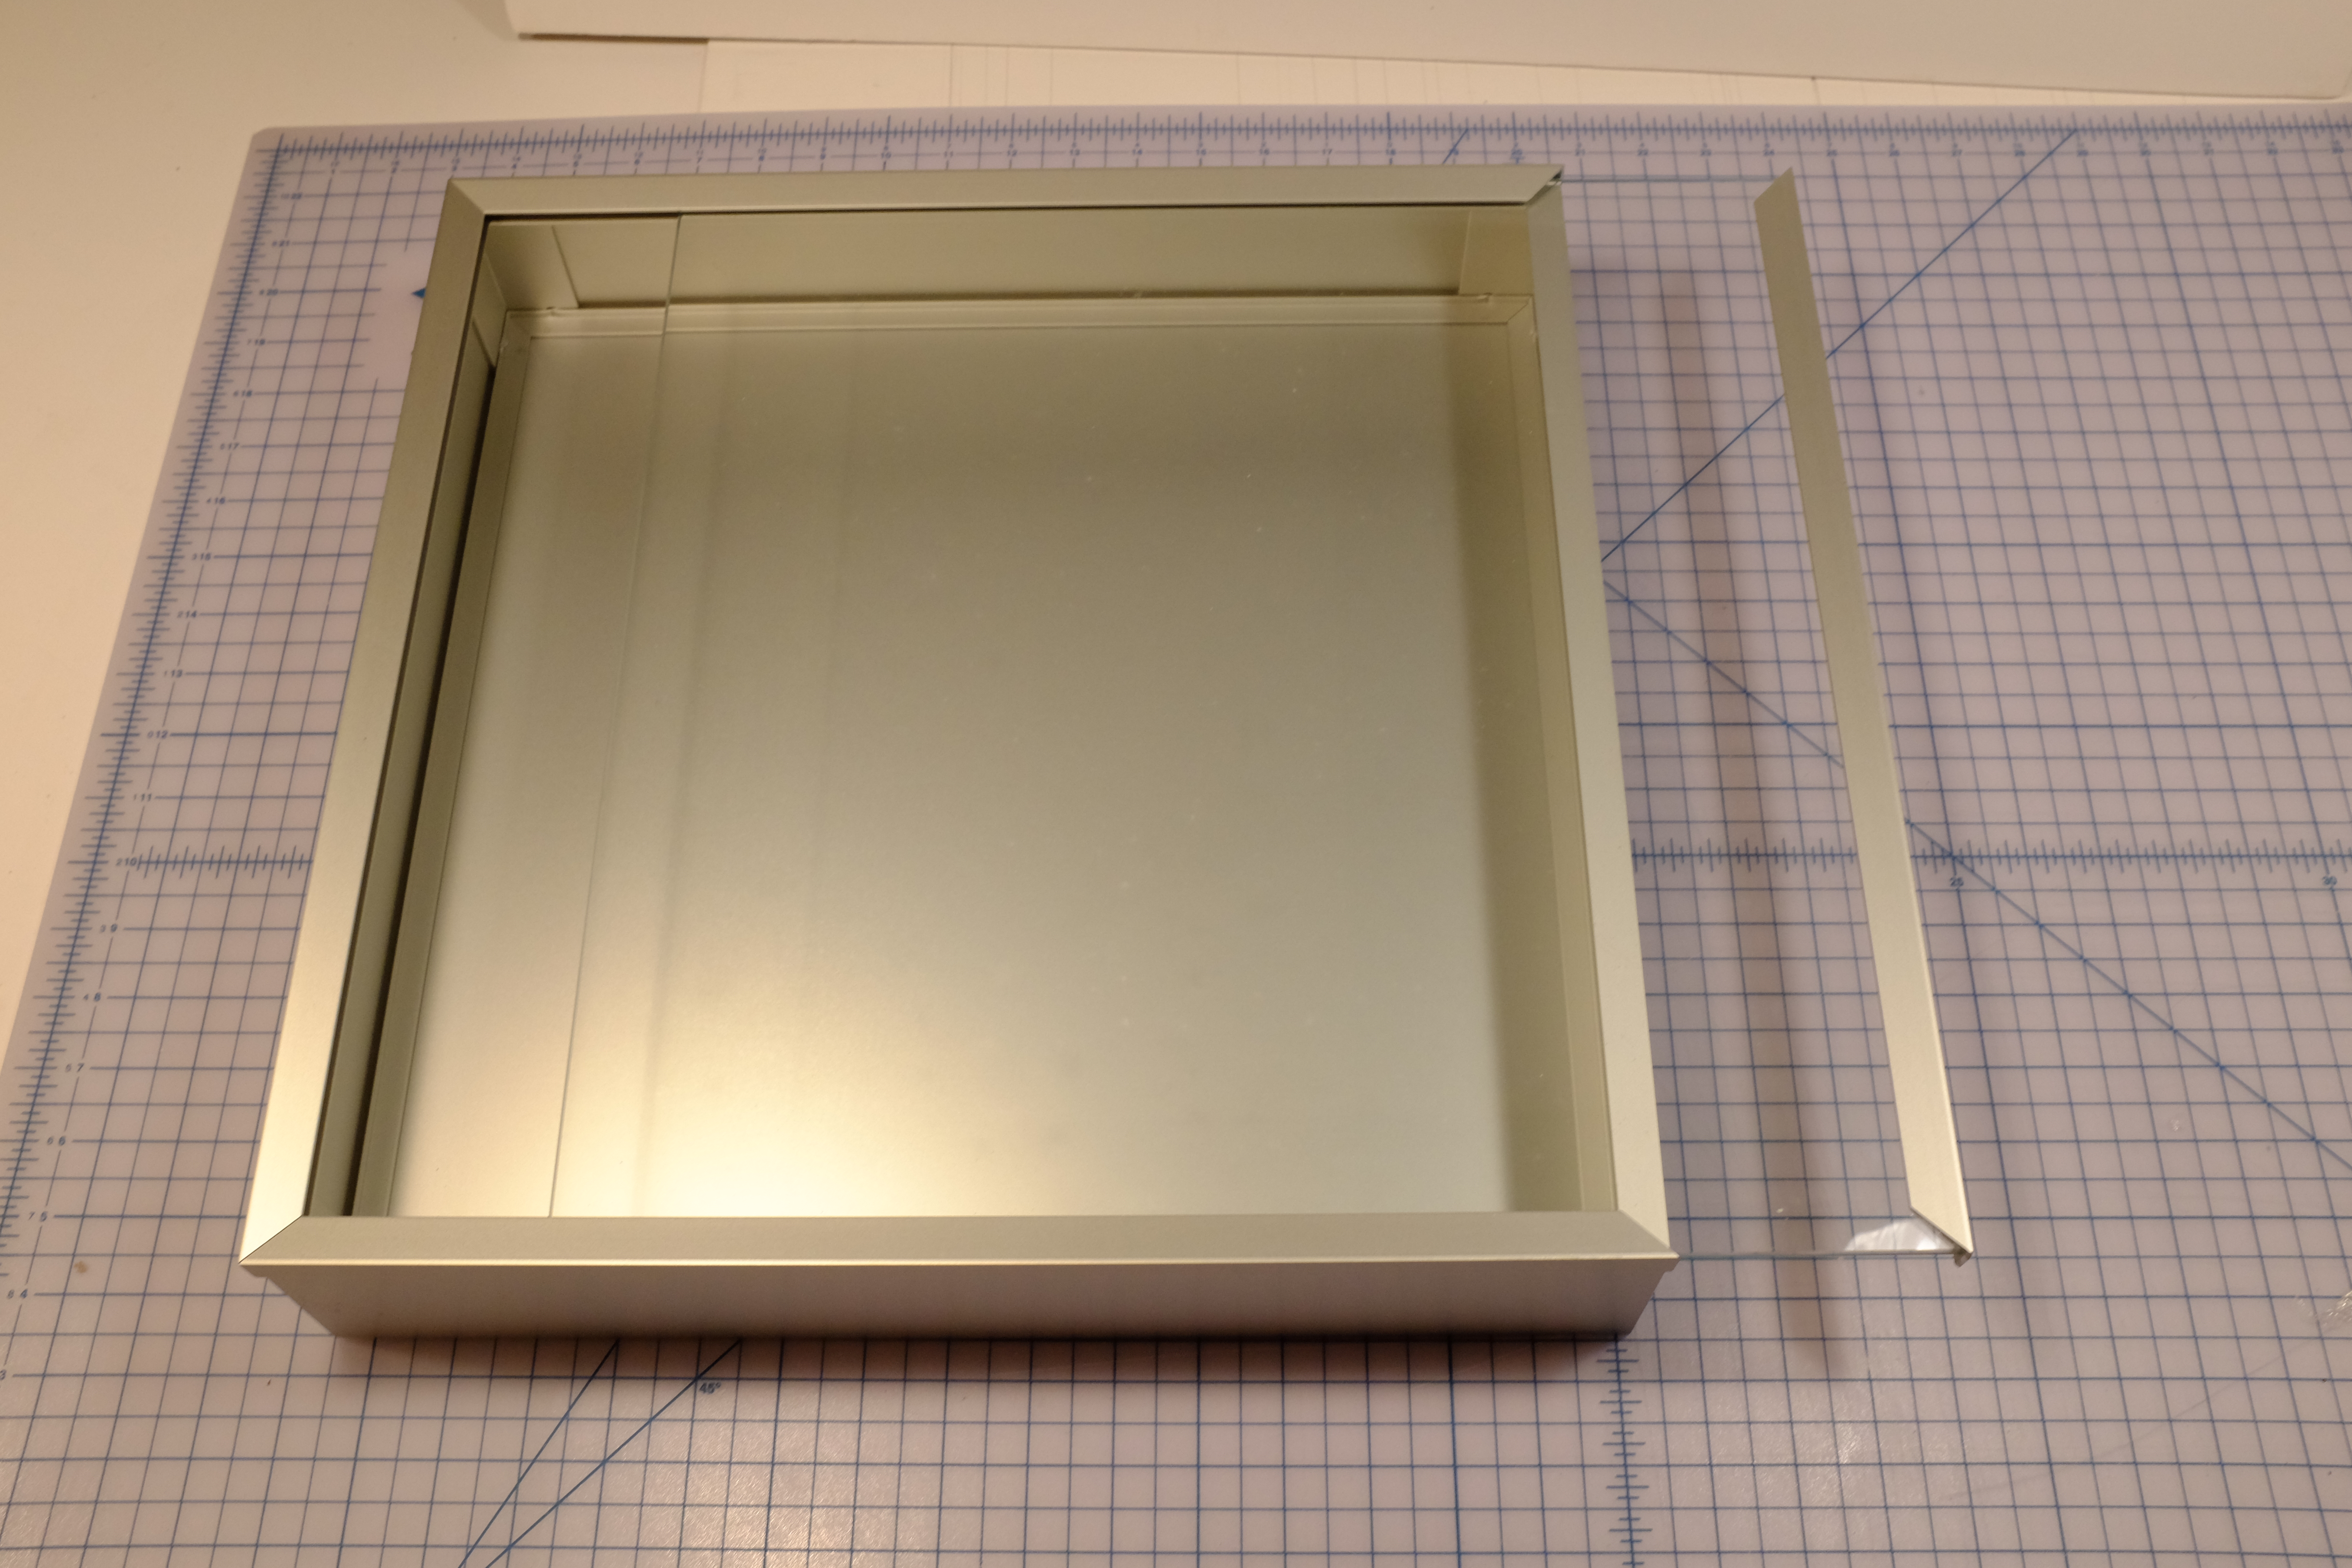
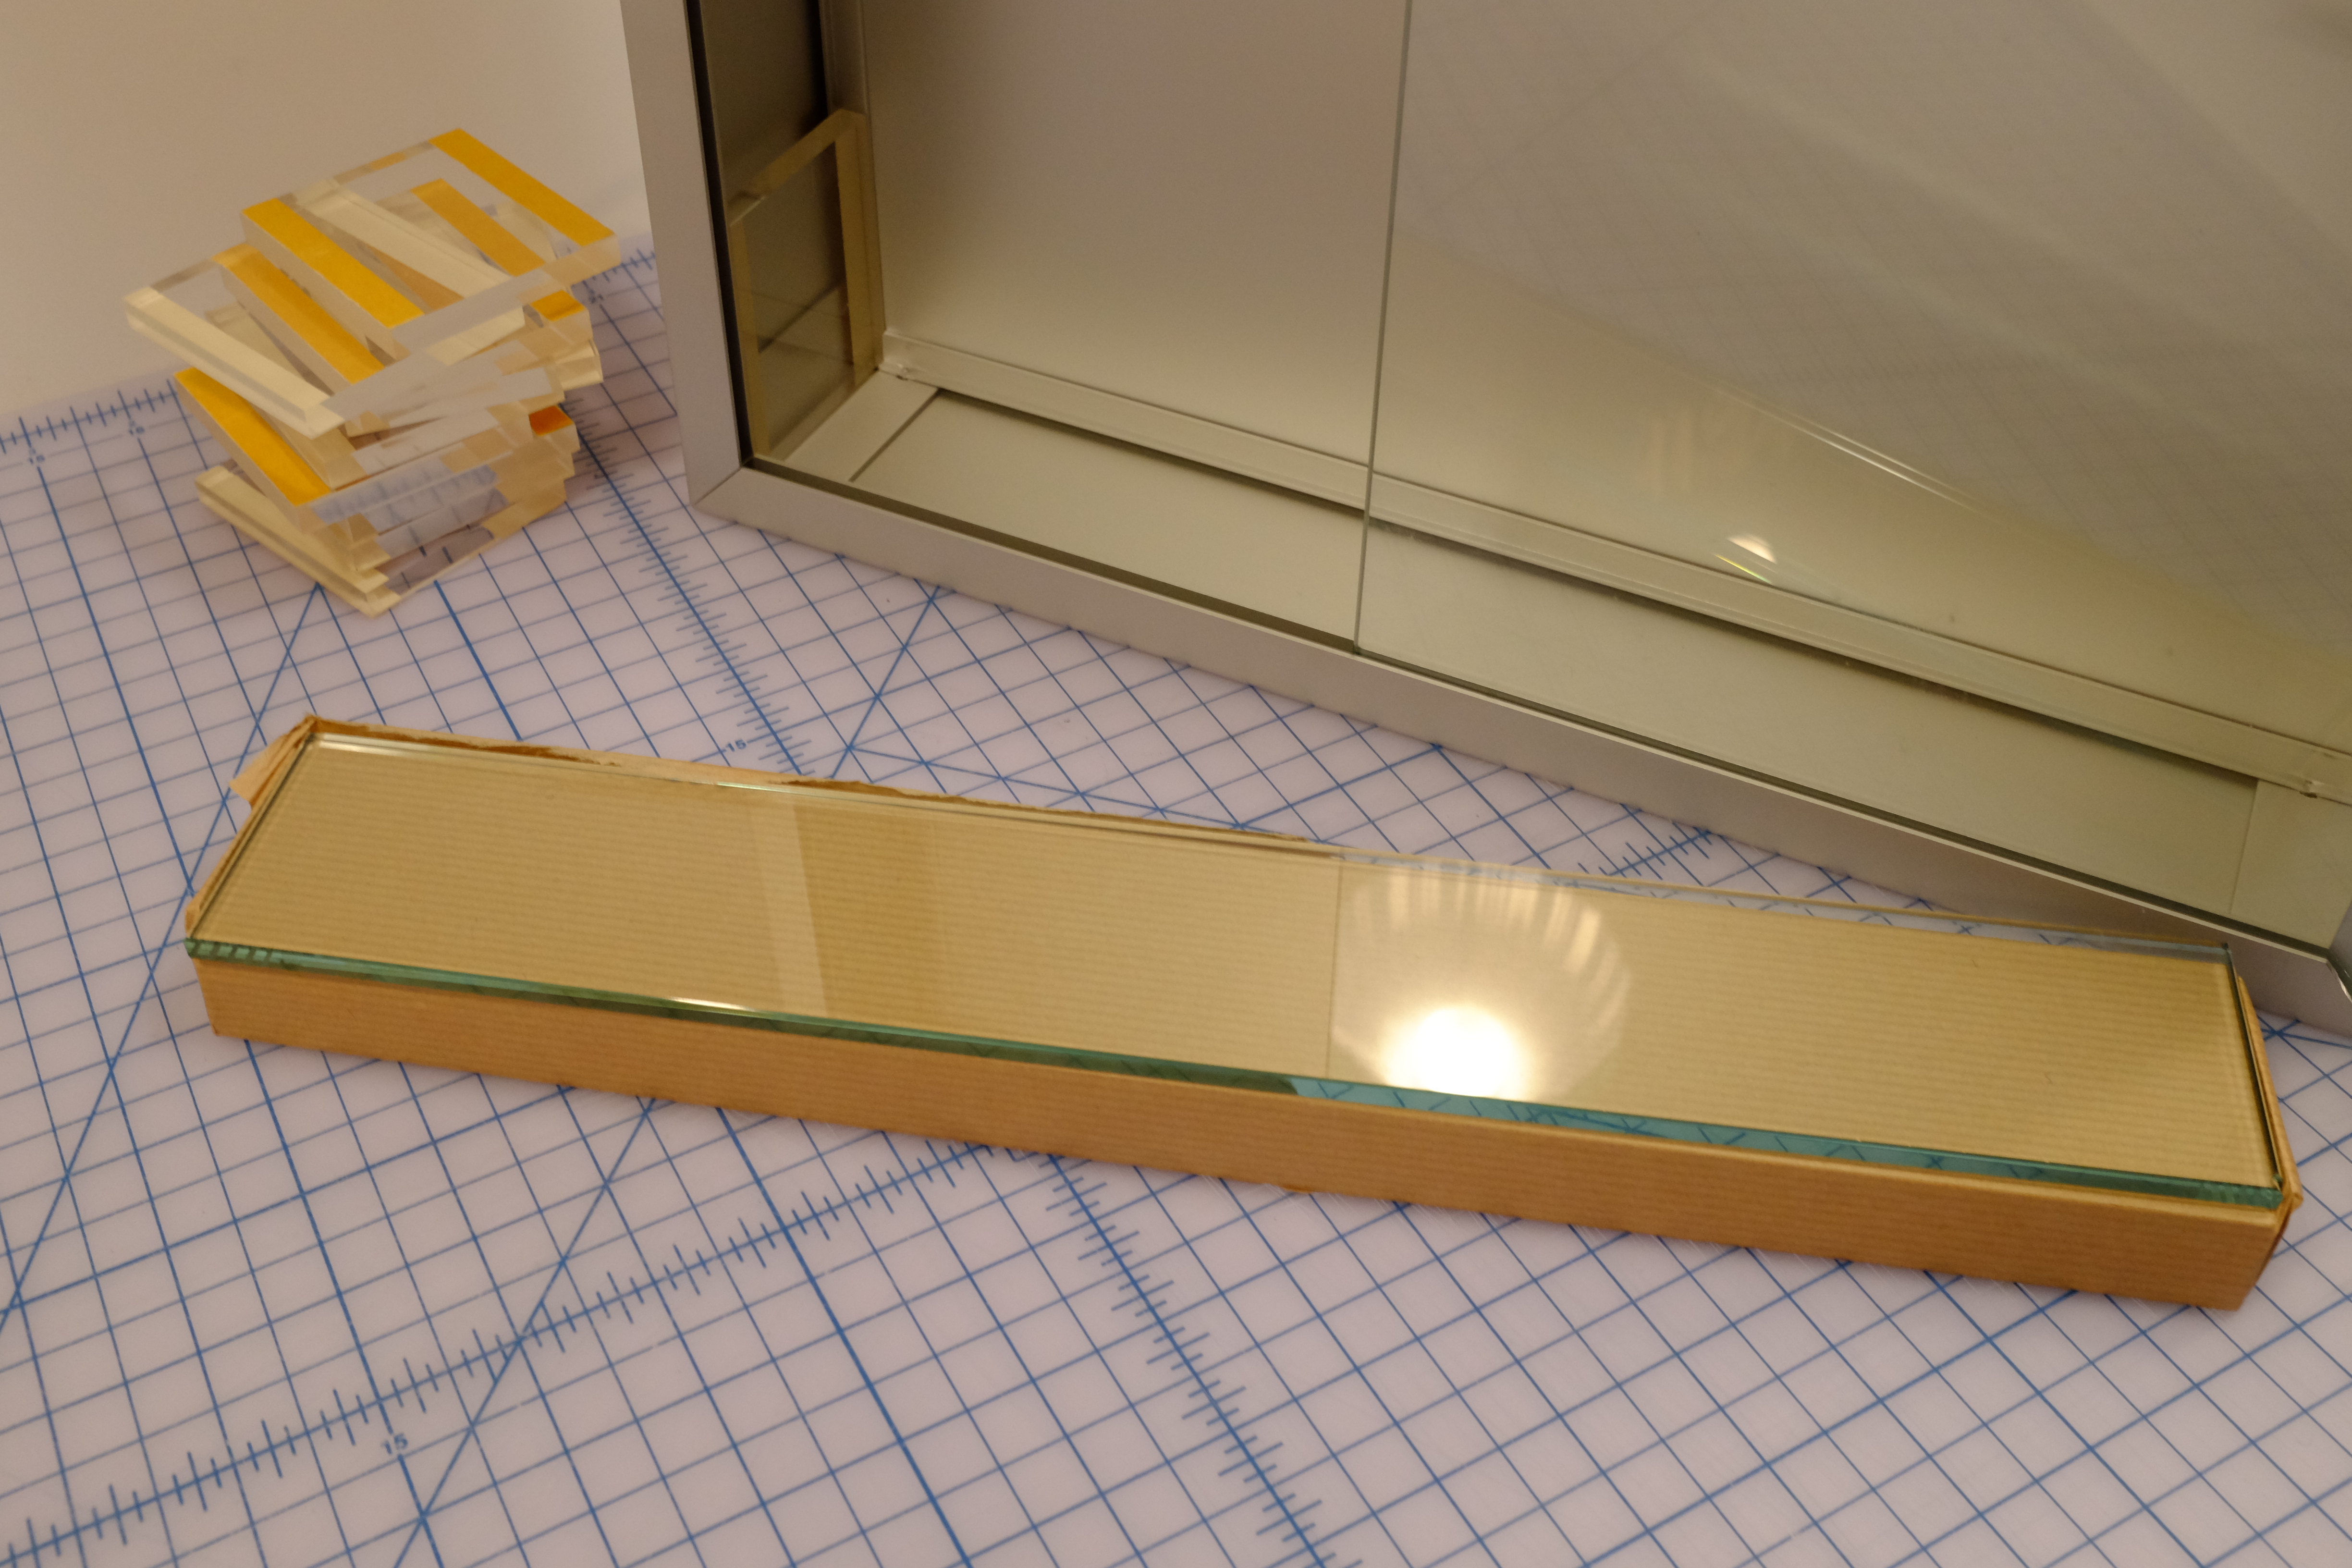
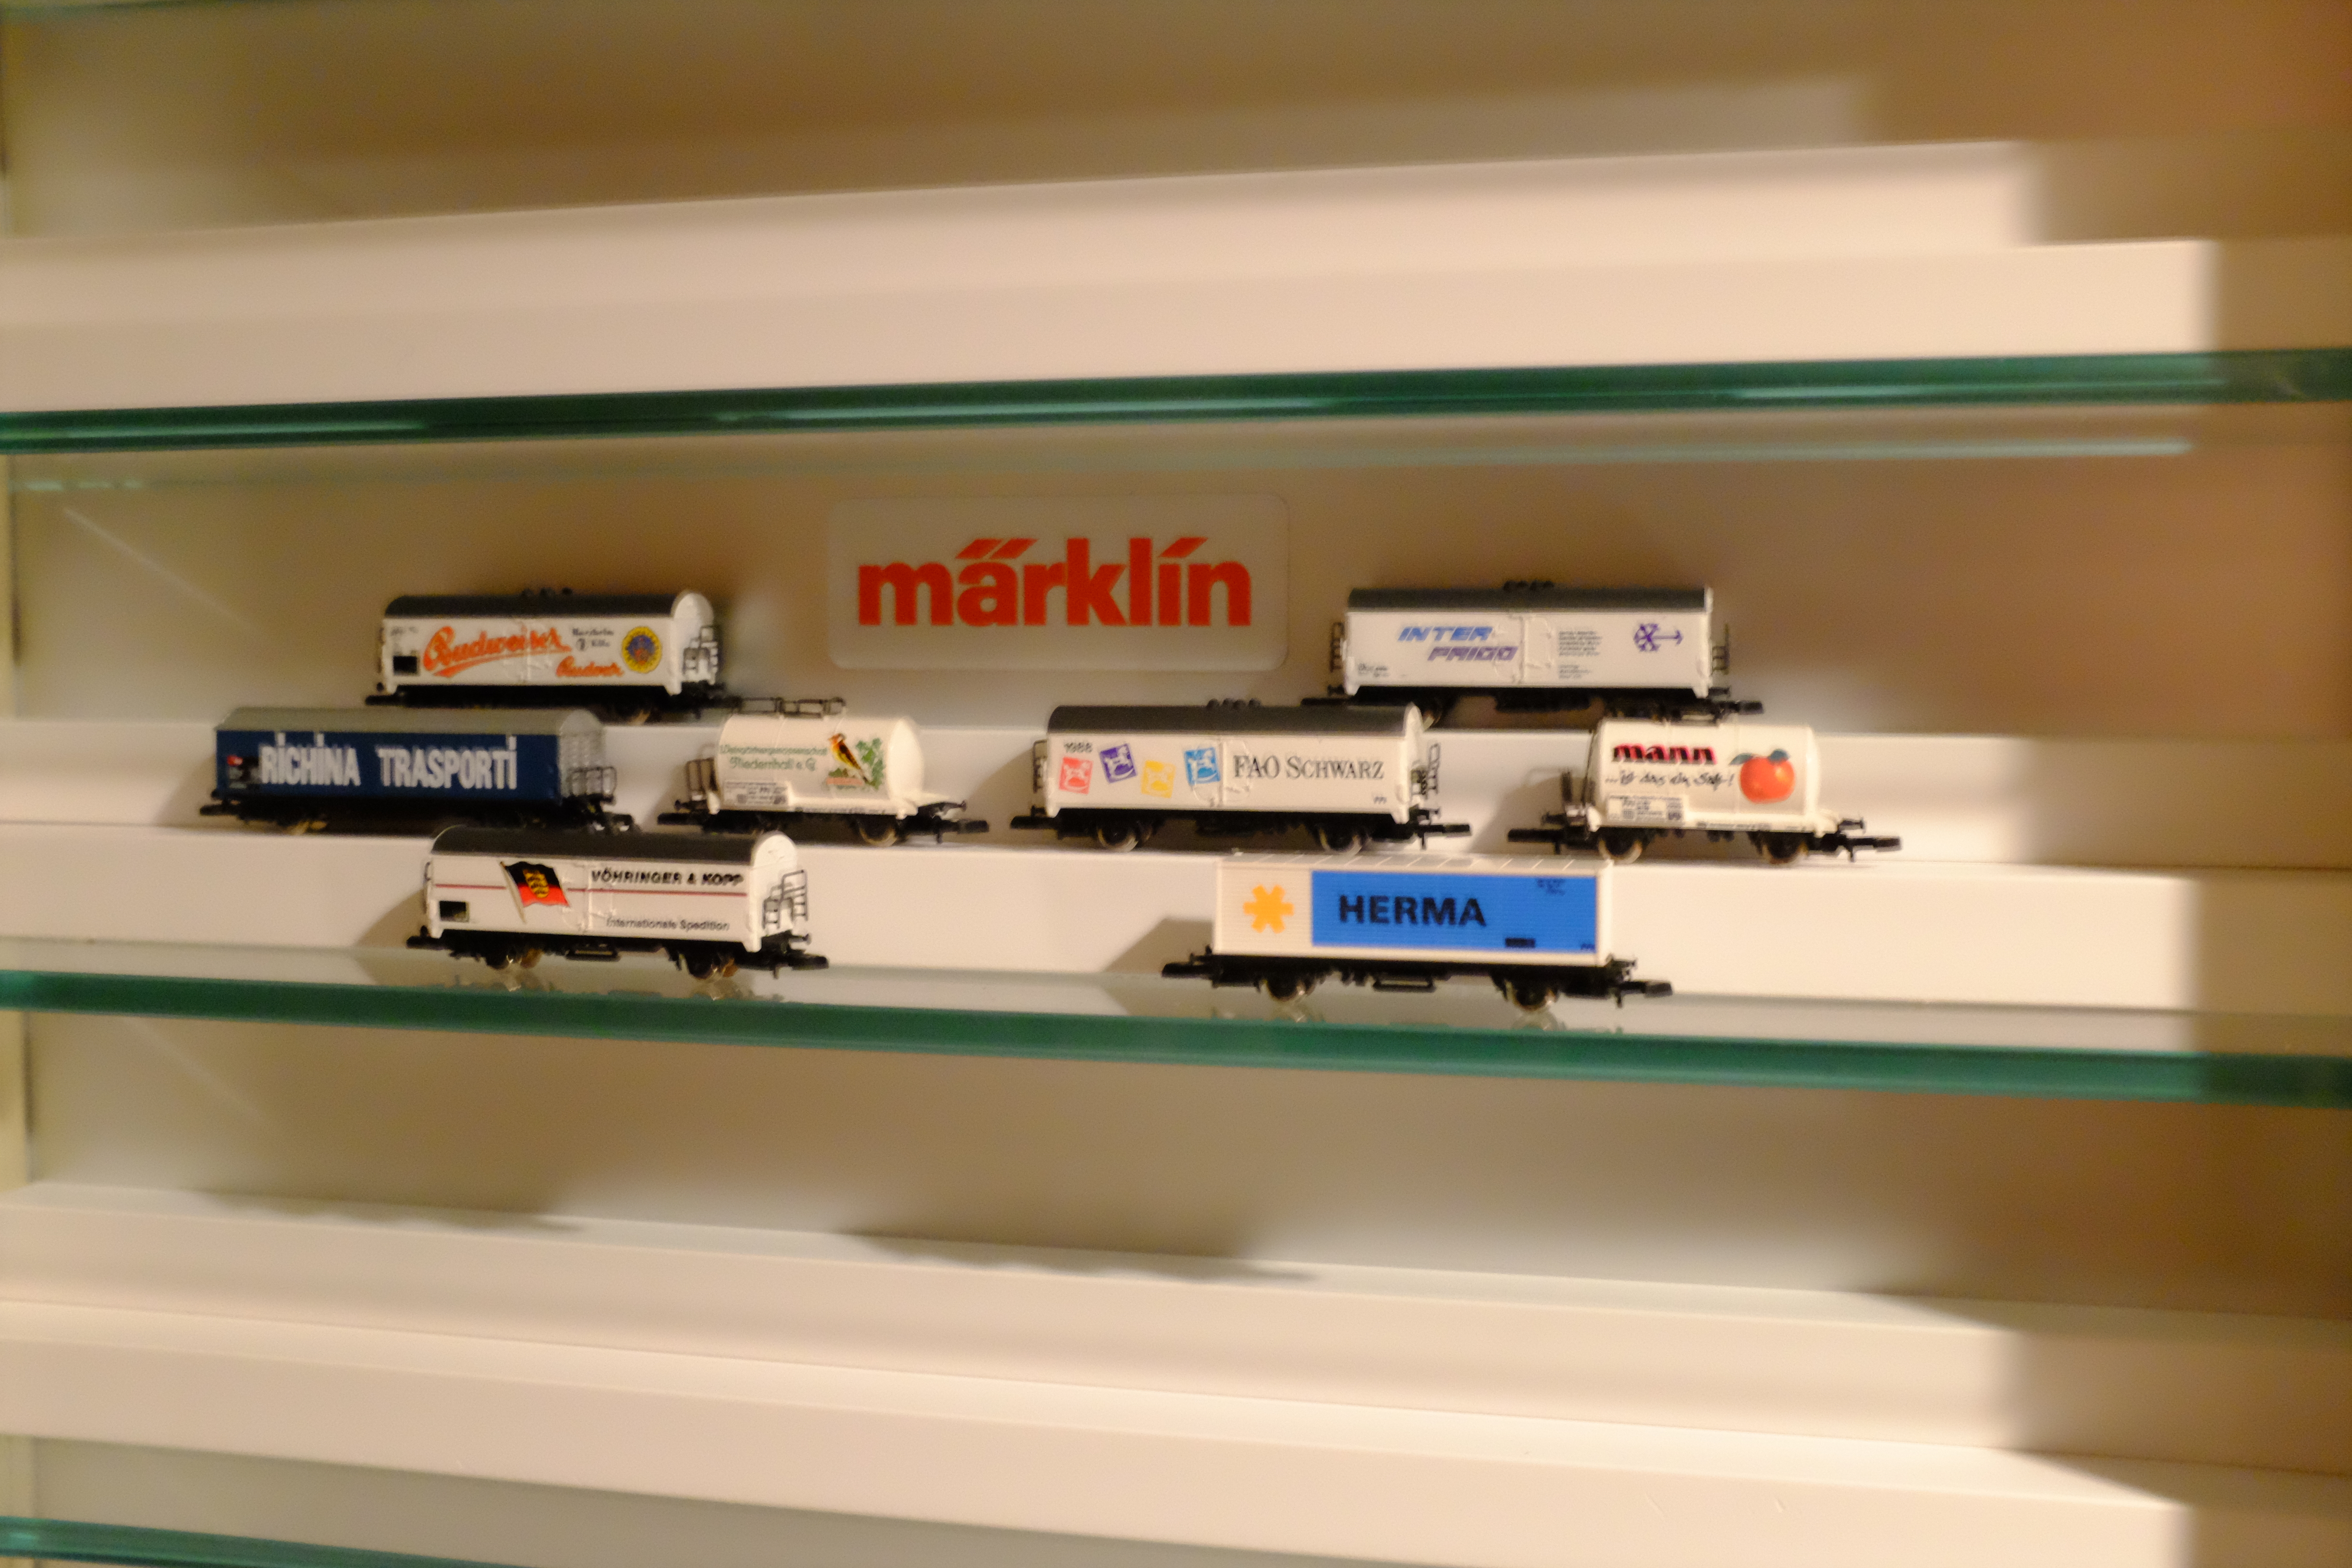
Marklin released the 89003 display for mini-club in 2003, its retail price at that time was $475. Featuring aluminum case and thick polished glass shelves 89003 was a compact display with limited storage. Many dealers that I have spoken to over the years did not order it for their inventory citing its big price tag, and some dealers convinced their customers not to order it. I was one such customer that was discouraged from buying it from a dealer who even had one in stock. I now own 4, and I would buy more if I had the space. The case is a nice bright display with modern minimal aesthetics, well built, and designed to complement z gauge without distracting from it. It is delivered in a heavy carton with heavy cardboard packing strips, glass is interleaved in paper and plastic wrapped around case, plexiglas spacers, hanging hardware and the Marklin logo silkscreened on aluminum is also included. Hanging is on a wall is achieved by placing the included ‘L’ shaped lag bolts into a wall on a level line approximately 12 inches apart, I chose to install on wood, we own an old Pennsylvania house with these panels. Otherwise install into drywall with the included hardware. The bent end of the lag bolts need only stick out about 1/8 inch to fit inside the metal channels at the top of the case so 95% of the bolts are secured in wall material.
Case requires assembly:
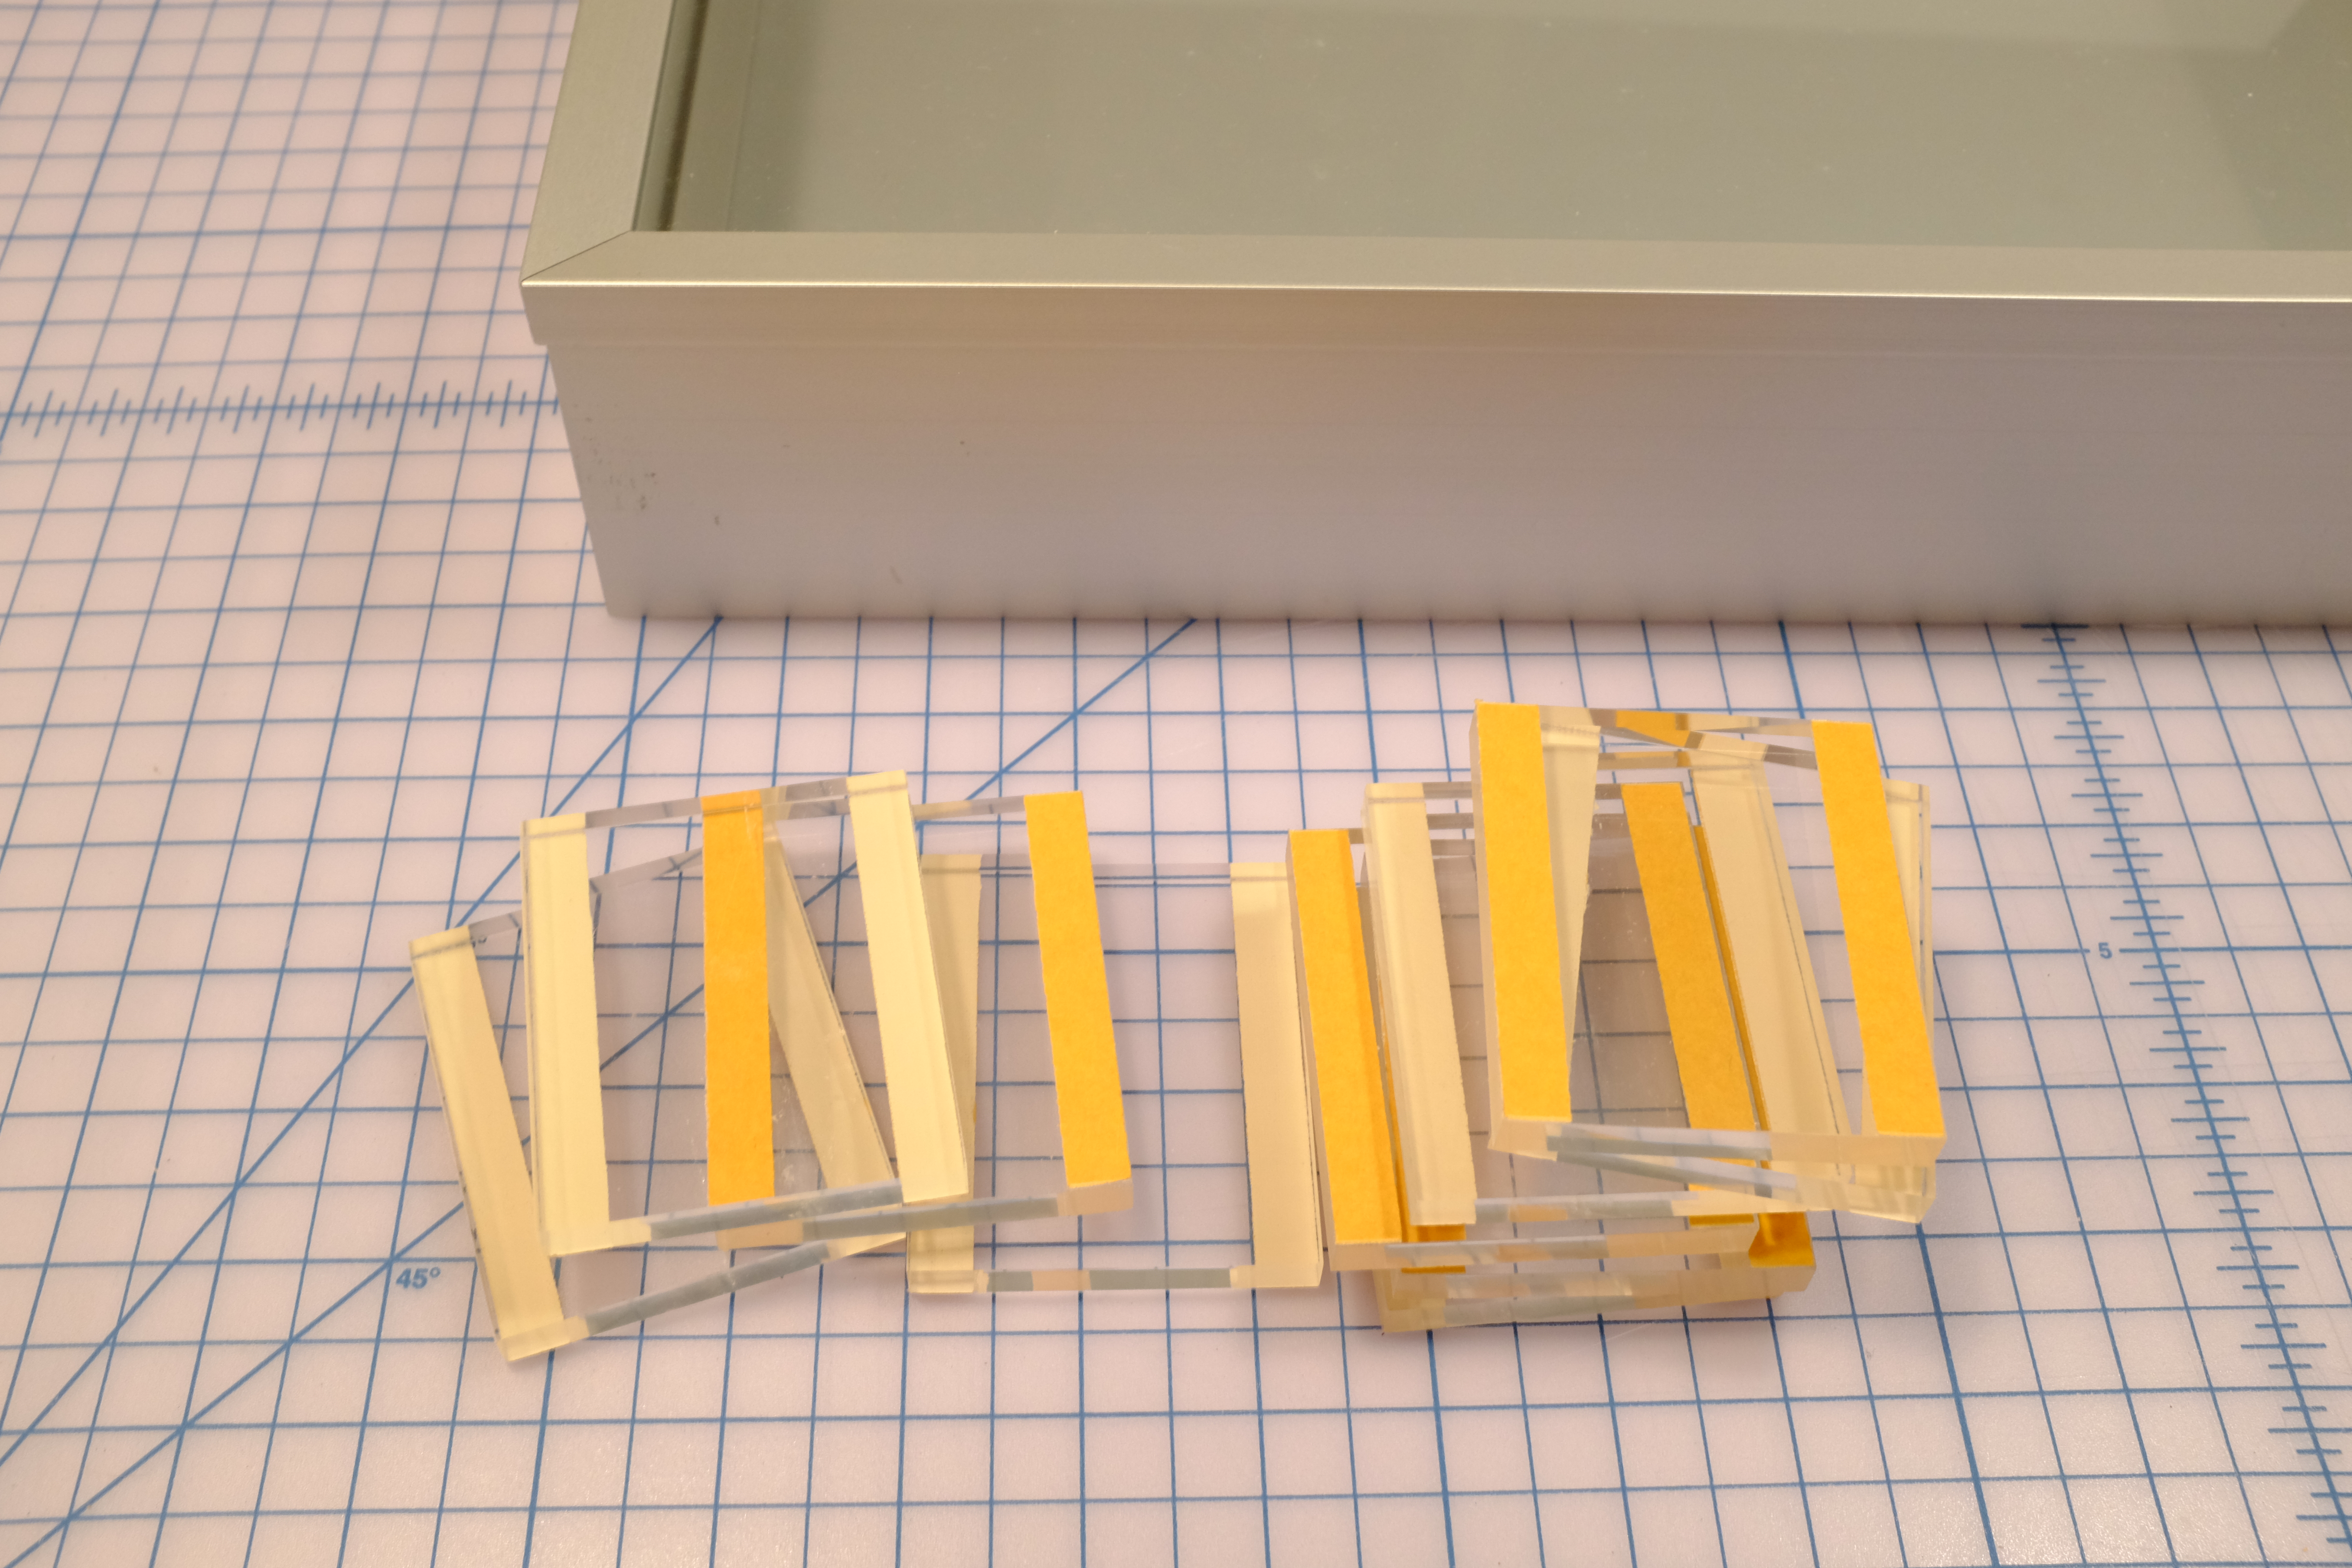
Parts: case, 10 thick plexiglas spacers, hanging hardware, “Marklin” logo, and 5 glass shelves.
Instructions: 1. unwrap and lay all parts on clean table 2. slide front glass pane to the right to remove, it is caulked to the metal molding 3. start with a clean piece of shelf glass placing it in the base of the case 4. plexiglas spacers have heavy duty automotive double stick tape already installed, remove tape backing and apply one to each side, these are spacers that hold the glass in place *keep in mind the glass shelves and spacers are precision cut and fit perfectly in place, it is best to double check shelves and spacers are aligned before applying pressure to the spacers, I have found little difference putting these cases together either in the upright position or laying back side down, also keep in mind the case can be assembled so the front panel slides out on the left or the right, it is impossible to change the orientation later so be sure of how where it is being installed and how you want it assembled for that space 5. plexiglas spacers follow each shelf until fully assembled *residue maybe present on plexiglas from the double stick tape, this does not show up much so don’t worry about, it you need to remove it use plastic polish designed for this purpose and careful not to scratch the plastic. Also shelves should be cleaned, ammonia free glass cleaner is the best for this 6. display your favorite z gauge cars and locos 7. clean front glass and reinstall!
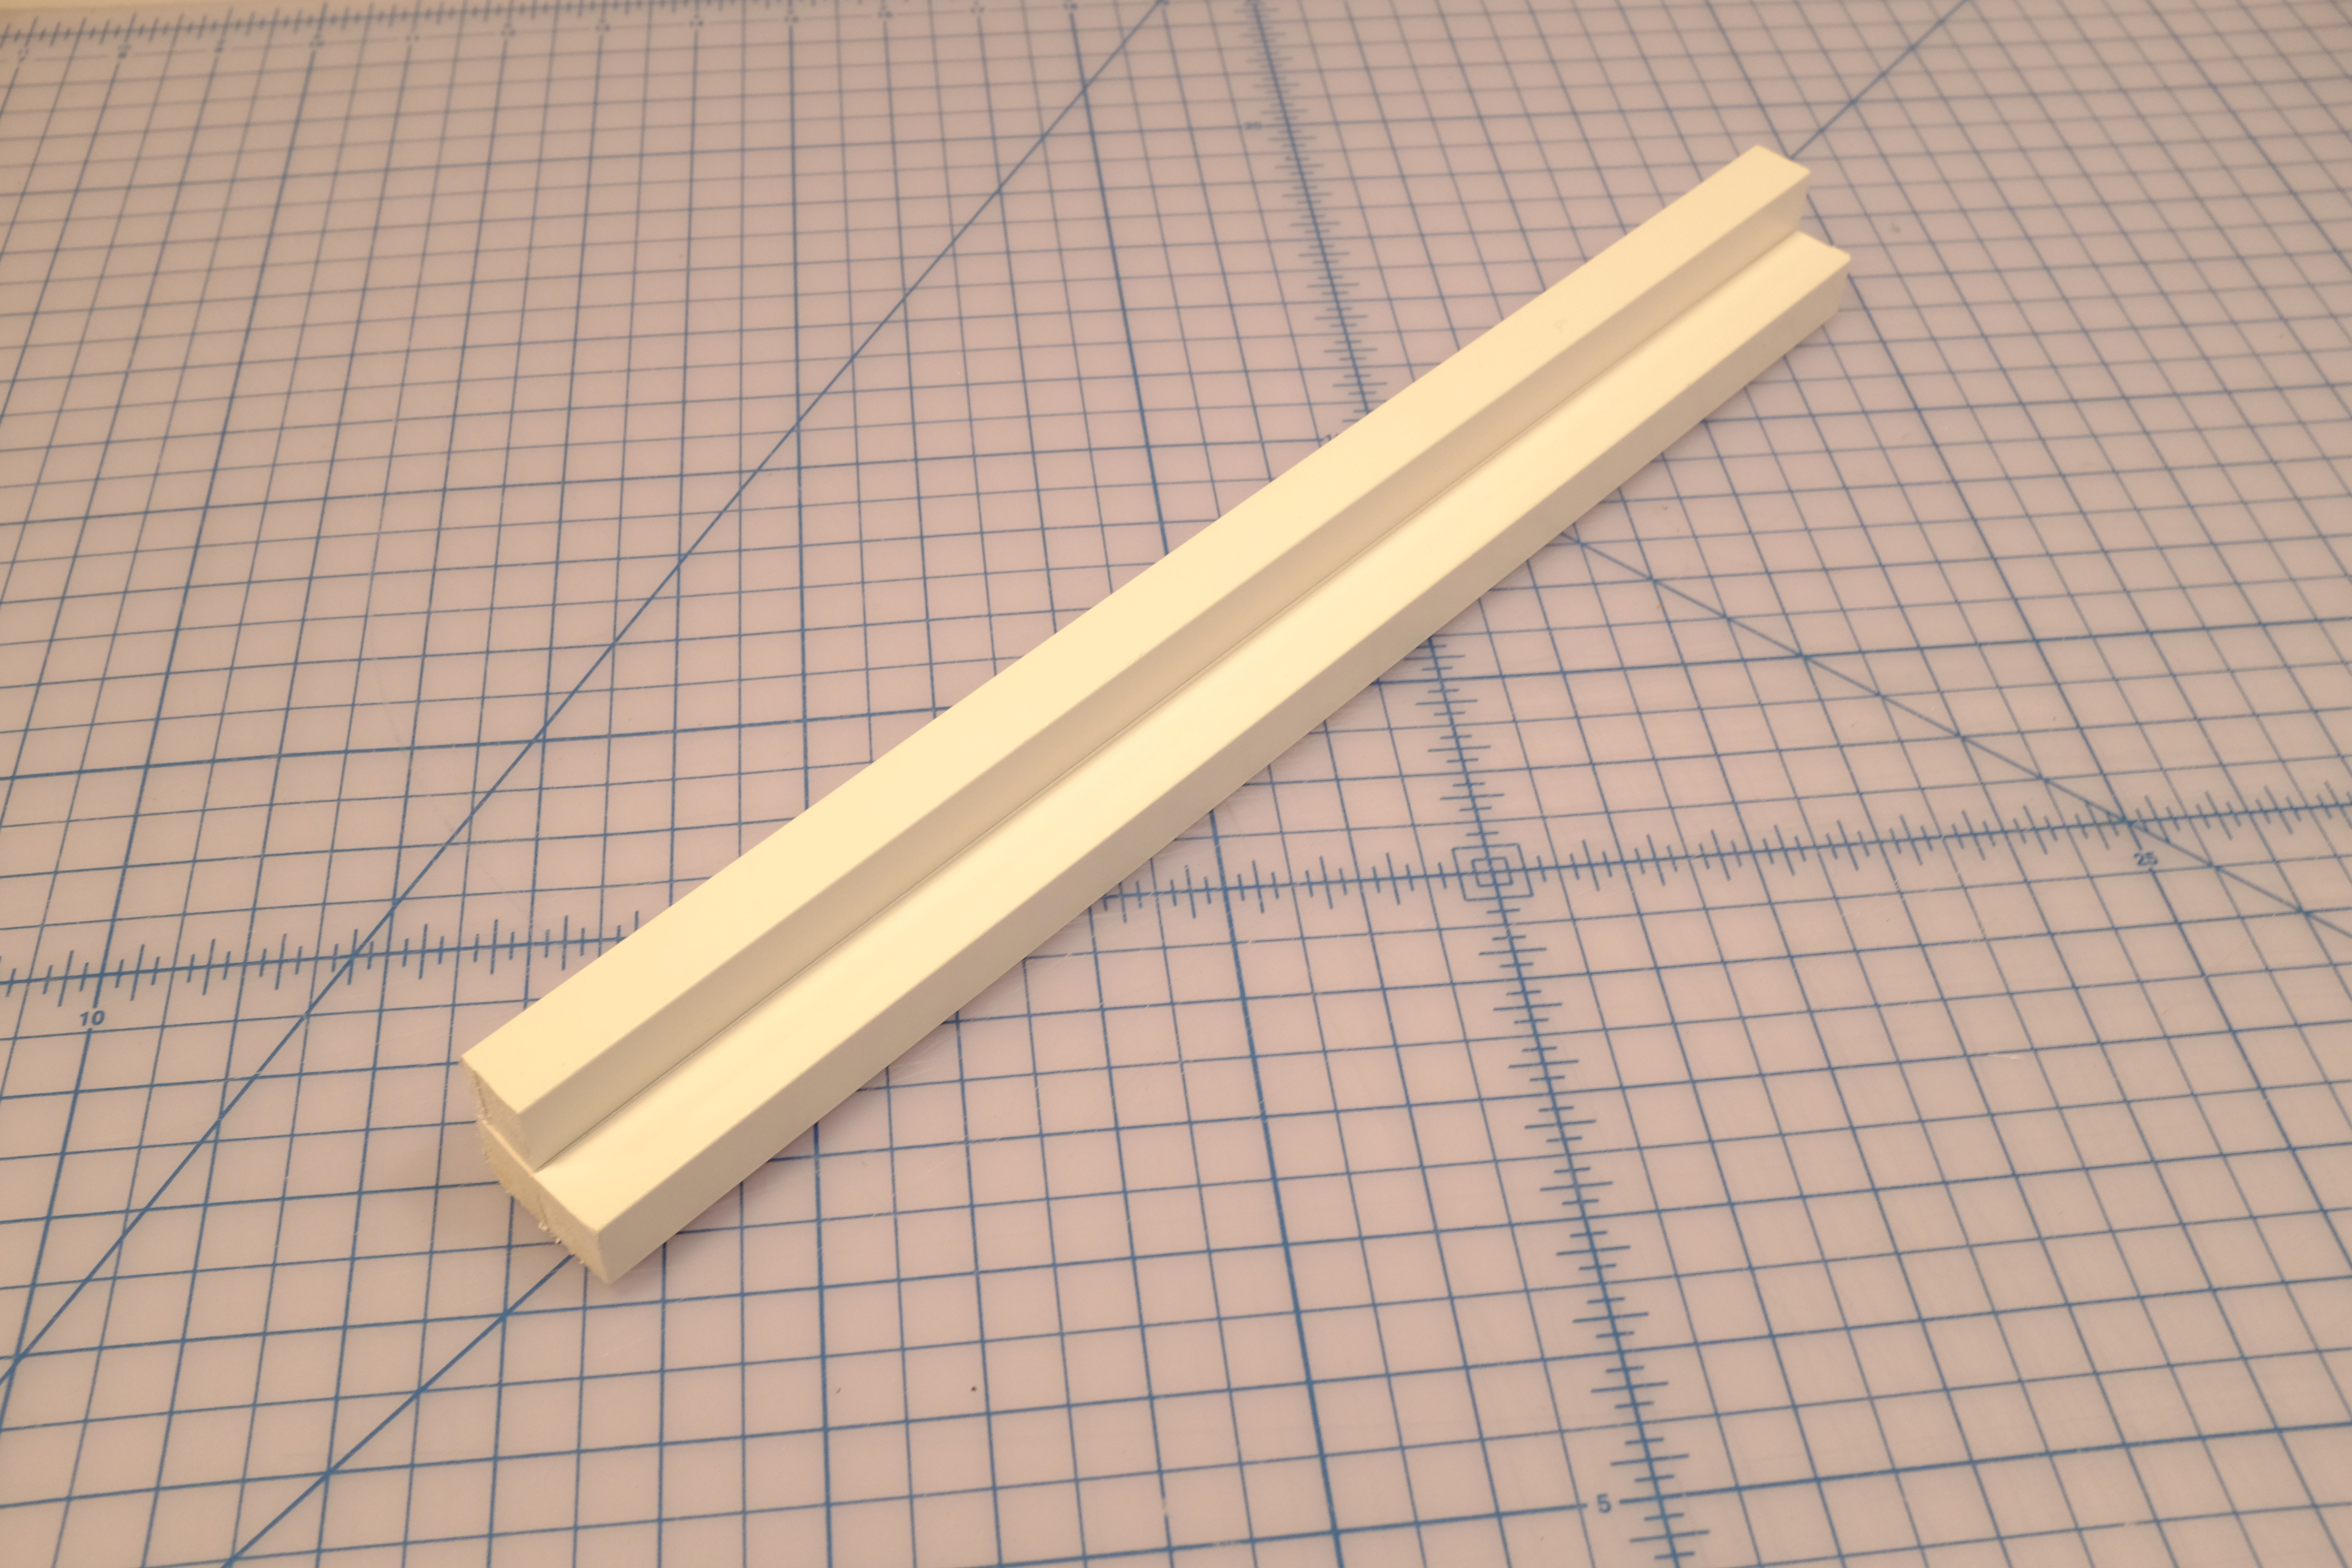
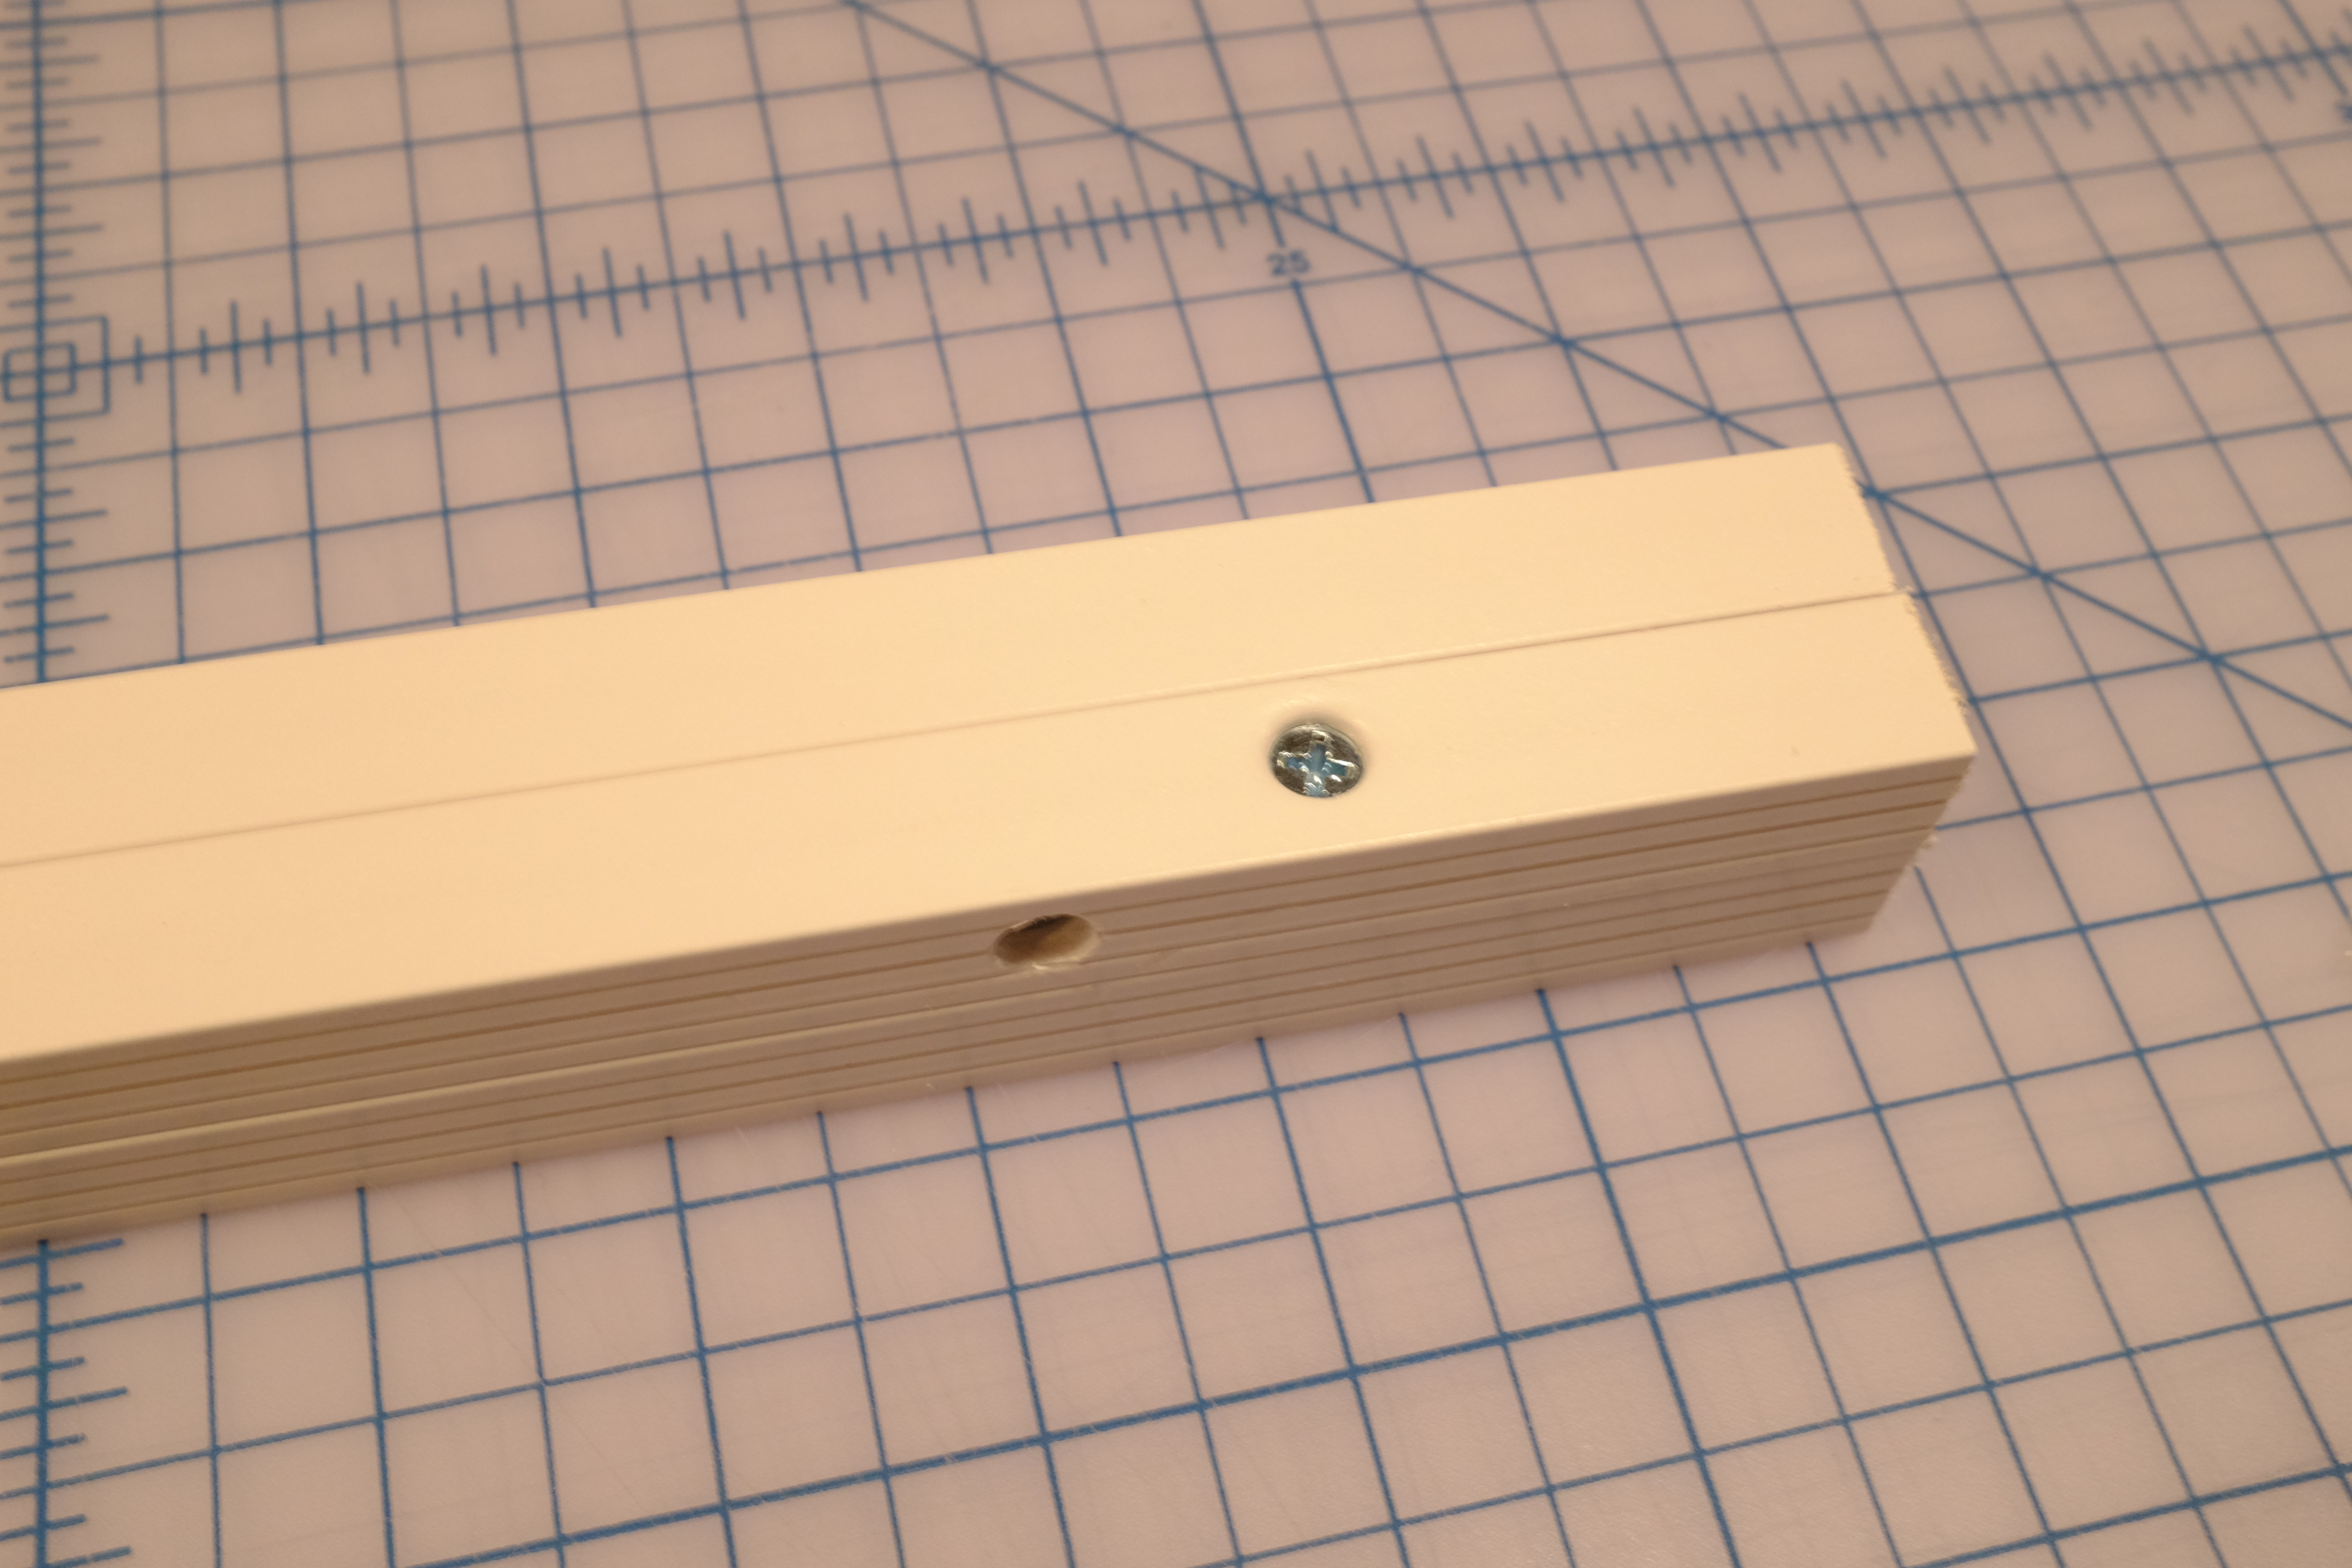
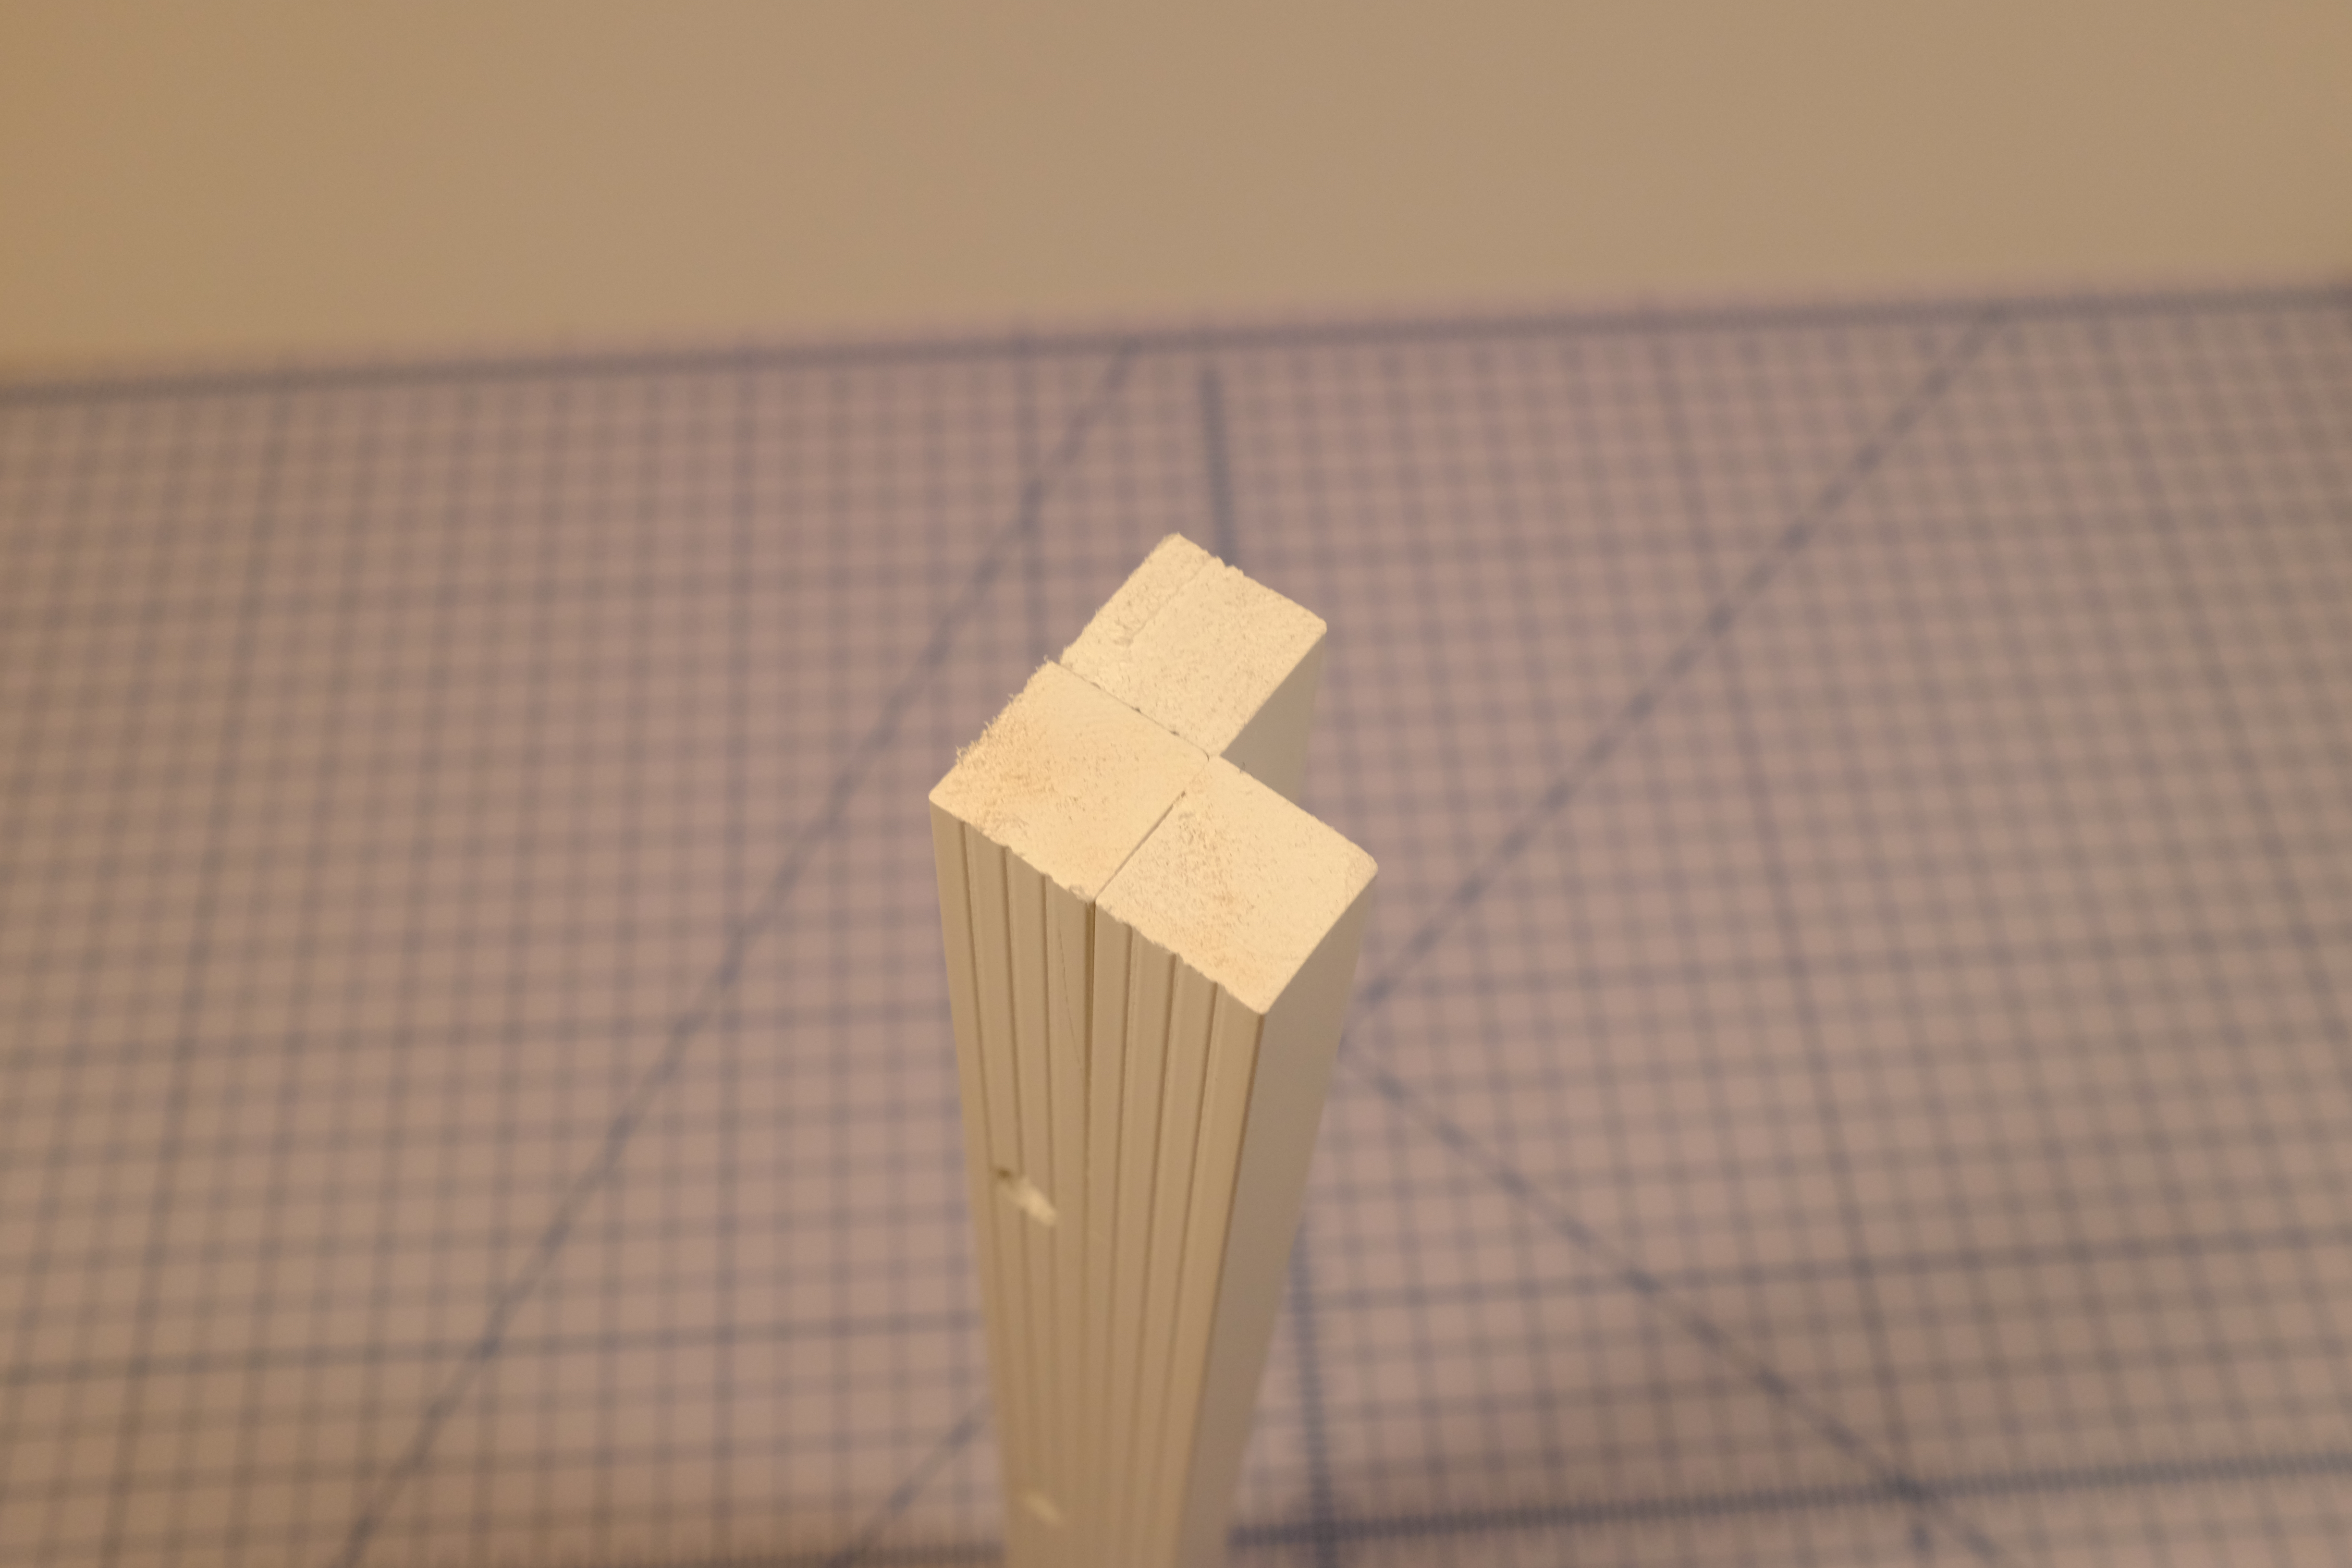
My modification: You spent a lot of money on the display and not many cars fit in, before you are disappointed with the value of this display: money spent versus small number of cars to display consider this: I have a simple and inexpensive solution to triple the storage and display and it stills looks like it came that way originally. Home building stores sell PVC 3/4 x 3/4 inch rods in the lumber department. Cutting these rods to the width of each shelf and assembling with wood screws you can make attractive white risers: 3 are required for each shelf. A hacksaw works perfectly for cutting the plastic and screw them together with wood screws *glue should not be used. I am including photos to illustrate this modification. This is a great case and one of the best to show off your special imprint cars and locos with easy access.


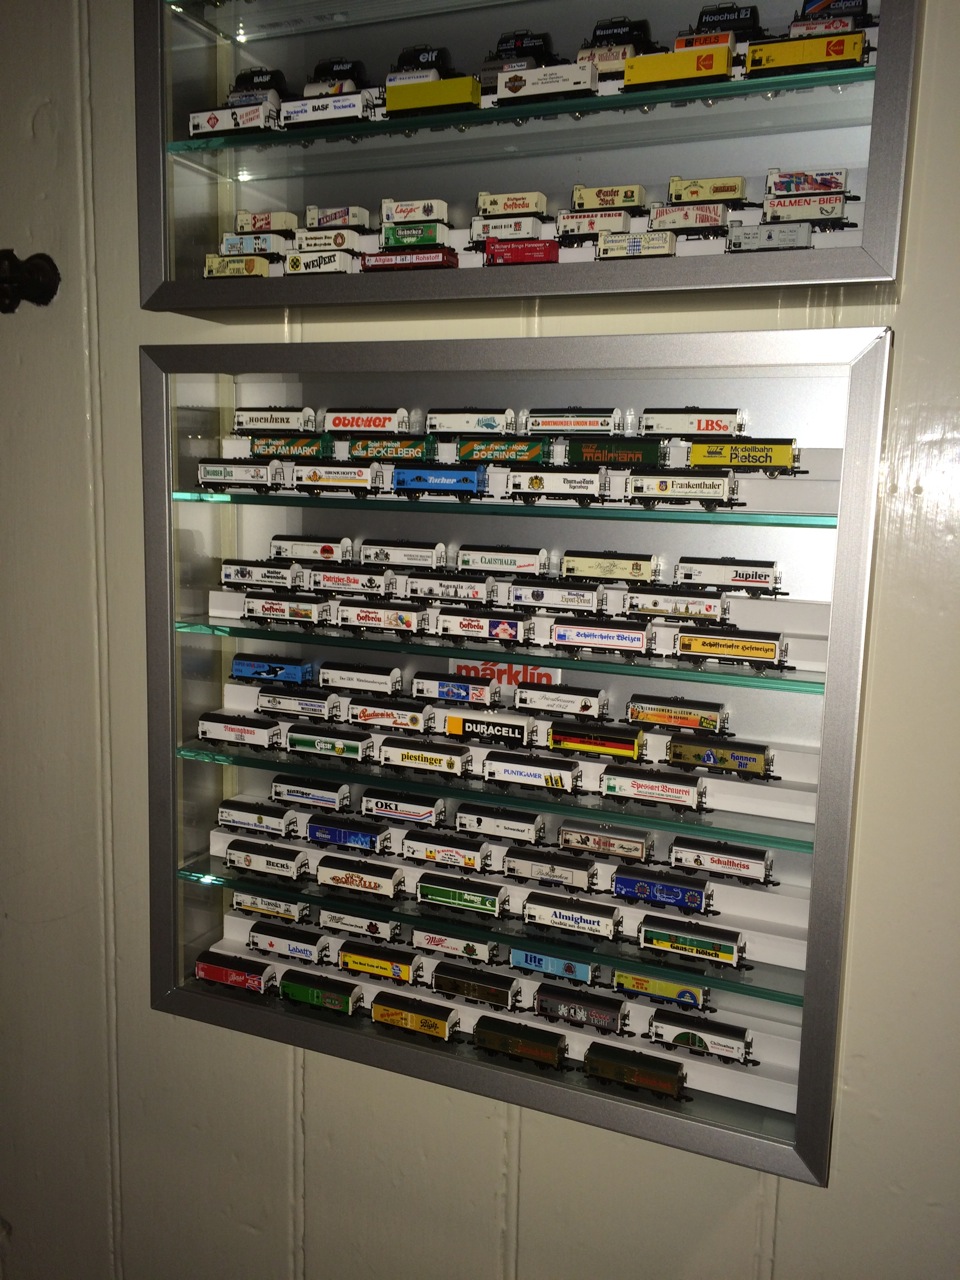
It is fun to display your trains, storing in boxes doesn’t cut it. This case is still available at Rocousa or MicroMacroMundo attached is the link:
http://www.rocousa.com/marklin_89003_display_case.asp