MBZ loco shed 16 103 features a single pair of doors thus this one bay locomotive shed is for the simple repair and storage of locomotives along a branch-line somewhere in Bavaria. It features timber construction and terracotta tile roof. Very attractive little shed with a workshop.
Foundation is cement outlining a long rectangle.
Here is a good MBZ kit to start with, but it too has it’s challenges namely with paint.
The sides of this building are heavily cut/engraved by laser leaving rather toothy edges in the paper stock, it is highly resistant to paint. Priming the parts as recommended for all kits is helpful, but airbrushing a color over the primer is what I recommend with this kit. If the paper fibers are course in an MBZ kit paint will be difficult with a brush, however smooth fibers such as the roof panels in this kit readily accept paint: persevere!
Building up layers of paint with a brush gives surface depth and depth of color versus superficial uniform paint: nobody wants to be superficial!
Window details with glazing attached are glued between framework side panels and outer detail side panels. Note: after the the initial structure is glued and standing on its own with glue dry and trusses in place but windows still at Home Depot spray paint interior black or graphite black by Krylon.
Doors are hinged in this model, but the solution is not that subtle: 2 small brass cabinet hinges glued in place between layers of card-stock. This is the first time I have encountered this type of hinge solution, initially I thought: UGH!, but after painting them they aren’t too bad; they are far more durable than other solutions and hardly noticeable with the doors open.
Using airbrush I applied a final acrylic varnish coat in matte finish to the sides and a semigloss finish to the foundation. Note: airbrush masking tape comes in a variety of widths, it is well suited to isolating areas to be painted either by brush or airbrush.
The roof is comprised of a chimney and 3 smokestacks made of wood, the kit included 3 printed paper caps for the stacks which I didn’t like and didn’t use. I built up layers of paint loosely mixed together to give a mossy and terracotta color. The protective coat on the roof is micro-crytstalline wax commonly referred to as “Renaissance Wax”, it was applied sparingly with my finger. Note: If using this product it is important to apply as sparingly as possible to avoid a waxy build up. Renaissance wax is a non-acidic/non-yellowing wax available at art supply stores.
Siding: Reynauld’s is the USA dealer for MBZ kits in numerous gauges and MBZ paints.
MBZ laser-cut building kits in Z are comprised of an extensive line-up with particular focus on Bavarian architecture including rural dwellings and railway buildings.
Based on real architectural prototypes the kits offer modelers an historical basis for layout design; they can be used generally for layouts with countryside scenes or inspiration for rigorously suggesting the topography and features of Bavaria and its branch line railways.
Included in this post is the Locomotive Shed Hofsteinach (MBZ Art.#16 057) Z gauge kit comprising two parts: administration building and attached 2 stall locomotive workshop. A late photograph I found for the prototype appears to show the building used late in life as a storage facility, evidence suggests it was not used with a turntable although a very simple one may have been employed at some point.
An introduction to these kits beyond historical perspective and including build quality leads to comparisons with other manufacturers of today’s laser-cut kits: Archistories and Faller. Each company has its own approach which is translated to each kit’s personality. Archistories kits are Prussian in basis and precision in nature from kit to completed building. Faller is rather more generic architecturally, and their kits sometimes could use a little more finishing, but the buildings are uniquely appointed with interior masking allowing nice details including curtains to be seen in buildings with interior lighting. MBZ kits have a personality uniquely their own, I have built close to 10 thus far, and each presented unique construction demands.
After opening an MBZ kit one will notice the uniform dark brown card-stock for the majority of parts, windows are separate fixtures on white cardboard. The card-stock is rather soft if compared with the card-stock used by Archistories, these parts also have carbon deposits left behind by the laser-cutting process: sometimes heavy. The kits also smell of burnt paper which is okay because it is rather subtle and one gets used to it. Large parts are also usually warped presumably due to the laser process. The downside to these kits are gluing, painting, and lightweight filigree parts such as trusses, but I hope to share my personal approach and help others build these kits satisfactorily because they are good kits.
Gluing: I use Noch 61104 glue because of its quick setting and flexible nature, it dries clear with a little gloss so don’t use it to fill gaps, gaps can be filled with brown tinted wood glue with better results. Before you glue to need to prep the parts to remove carbon deposits, manufacturer suggests sanding sponge or wire brush, but I use a paper towel and brush away the dust. Best use is made of gentle approach here. Note: youTube video posted by Reynaulds shows Thomas Oswald building one of his kits using UHU Hart glue which is an excellent glue but rather messy with strands that seem to pull away applicator after application.
Painting: MBZ kits are raw cardboard, they are not pre-tinted like Archistories and Faller thus painting is required. MBZ has a line of pigment paints which are applied with a sponge which are reasonably priced in kits, but I prefer using Gouache watercolor paints which I will ouline here. The first step is priming the parts before assembly and painting other parts before assembly. I use Gouache for several reasons: building up texture, quick drying, excellent color choices, and can be lightly sanded. Gouache is opaque watercolor which can be diluted with water for more transparency, it also mixes well with other colors. But as with certain other artist media Gouache needs to be protected by a final application of lacquer, I use acrylic lacquer applied with an airbrush. Lacquer comes in matte, semi-gloss and gloss, the choice for each is complicated by the fact that each will impart a different surface appearance but also and more importantly different levels of color saturation thus gloss will impart the colors with much more saturation than semi-gloss or matte. I also use the micro-crystalline wax by Renaissance which gives a waxy/gloss finish appropriate for textured surfaces, I don’t use it often but for those situations it is suitable there are no substitutes. Preparation for paint: first prime the parts thereby sealing the paper. Note: MBZ textured laser-cut parts for some reason resist paint, I found a drier paint (less water) was required, too much water in the paint pooled on top of the parts. I find MBZ kits to border on primitive, I embrace the soft edges of the paper parts and uneven color application therefore I have tended to use brush versus airbrush, it is a technique where I was able to control paint thickness and shading, but a combination of airbrush and brush should yield excellent results. With MBZ kits for me are about embracing buildings with age and years of history, I have found it better to push in the direction of defects than perfection with these kits thereby bringing to the surface years of use.
Very delicate filigree parts such as trusses are difficult to work with in MBZ kits, they are best to be glued to the roof panels before inserting into loco sheds as suggested by the manufacturers’ illustration which also serves as assembly instructions. Note: Instructions in the form of a short text accompanies a large illustration which I have found at times misleading and/or challenging to say the least, it is best practice to lay the parts out and try to understand fit and placement before gluing. Note: reread last note!
For each MBZ build kit I post now and later I will describe trouble spots with the kit in question and technique I used unique to that kit.
Loco Shed Hofsteinach: All in all a very good kit and equally nice building of medium size. Unique to the architecture of this building is scale, it looks much bigger than it really is which is a unique achievement praised in architecture. Construction of this prototype included brick infill siding with numerous windows framed in iron, stucco and shingle administration building. The kit included hinge design for the 4 large wood loco shed doors which involved super gluing a pin (nail) to the edge of each door panel, due to the thickness of the pin and securing the doors to it I chose to forgo working hinges and permanently glued the doors in place. Trusses are very nice in the kit, but they are very lightweight although prototypical in scale they are hard to work with, they should be glued to the roof panels before installing in building as suggested by the instruction’s illustration. Window panels are glued to the outside of the building’s framework and outer panels glued over top which is a little different from the other manufacturers.
I used the dry brush technique and build up color on the brick infill siding finishing with airbrushing a light spray of gray/black.
Door panels on loco shed were first stained with a brown stain followed by a wet brush of gouache with grimy black paint and finished with light airbrushing.
Roof panels were darkened with gray/black using airbrush. Note: manufacturer did not include smokestacks, but I will include those when the building goes to layout.
Adminstration building includes aged shingles and stucco. I came up with a color for the stucco I was happy with and added white charcoal powder for texture, this layer was followed by a slightly darker tone to suggest weathering, age and repairs.
Shingles were darkened with a light spray of gray/black. Foundations stones varied from one side to the next, I colored matched the administration building’s stone color for a uniform look around the building. Note: it is not uncommon for foundation stone color to vary depending on construction time-frame and changes made to original structure over time.
This very solid, designed and proportioned loco shed is a very good building for branch-line service.
Siding: only USA dealer for MBZ is Reynauld’s in Illinois.
If you are a specialist Swiss modeler in Z chances are building structures have been difficult to find off the shelf. Or perhaps you are already building scratch-built structures. This post focuses on two rare off the shelf structures, but they could also be successfully built with balsa wood from your local hobby store.
Two very interesting alpine structures are a covered bridge and guardhouse used on the RhB railway (Rhaetian Railway). The covered bridge was offered fully built by FiDES of Switzerland, it featured balsa wood construction with printed (not etched) shake tile roof.
I wasn’t able to find any current information for this company, this one being the only example I have found. I cannot verify when the bridge was produced or whether it was marketed outside Switzerland, I found this one on Ebay.
In addition to being fully assembled the bridge was further glued in place within the cardboard carton thus I was not able to do a great job photographing it for the blog post. By my count the bridge incorporates over 100 individual parts each measured, cut and assembled: lot’s of work.
A similar bridge could be scratch-built using balsa wood and leftover parts from other kits for the roof. Good scenery construction could include this bridge known to Alpine hikers in multiples along a path and over water or even rock falls. Steep inclined features would also include granite outcroppings, pine trees, snow or random length grasses with pretty flowers. Bridge used in a town setting would also feature flower boxes because hey this is Switzerland.
Another good Swiss alpine structure is an older FR building kit for guardhouse on the RhB railway.
Very infrequently FR produces metal and wood structures that bespeak the precision and historical accuracy presented by FR in each one their releases. This building kit includes numerous dimensional strands of balsa wood as well as etched balsa and nickel parts including window frames.
Instructions are in German with excellent photo illustrations, using illustrations only I was able to deduce the order and correct assembly of all parts. Metal gutters and downspouts I will add in the future along with finish work, but at this point it looks pretty good, and I am happy with the results.
Although a very small building it required hours of assembly including measuring and cutting window glazing plus measuring and gluing all other parts.
A good solid building that features already painted metal shutters, doors and window frames. Roofing material had to be measured then cut, it was printed on textured paper to give the look of three dimensional terracotta tile, even the color is very good.
I probably won’t add aging to this structure as I associate Switzerland without air pollution, but perhaps even darkening is a correct patina? Chimney will get dressed up with a piece of flagstone during finishing touches as well as stucco application to sides with white paint. Footing for vertical support beam will also be painted concrete. And one cannot forget flower boxes hey this is Switzerland!
The prototype probably included a signal and short siding for passing trains, but as of this writing I have not found a picture of the prototype. For the layout this building could be connected to the hiking path previously suggested with the bridge, it too could have been a way station for hikers boarding a train, but this is a far off structure in the mountains inaccessible to auto traffic.
Siding: outstanding glue with easy applicator is Noch Laser-Cut Adhesive #61104 available from zscalehobo.com, I highly recommend this glue for laser-cut card stock, balsa wood, and metal or any combination thereof.
Tilled earth, tractors, cows, horses, wagons, people, crops and fruit trees are just a few of the many items a modeler can include with the rural landscape. But missing no more are really good barns and farmhouses in laser cut kits by Faller and Archistories. The recent release of two versions of a farmhouse and barn come from Archistories and include framework construction as does the earlier release by Faller. But Marklin too released a barn (slaughterhouse) with suggested stucco construction. So thus far there are many farm buildings with Archistories receiving the big award for Best in Show!
Archistories “Kallental” (ARC-405171) and “Dorpeder” (ARC-406171)
Faller Bauernhaus (282785)
Marklin 89791 (slaughterhouse including accessories not pictured)
Photo 1: Hartum (village near Hille, Germany)
Photo 2: Hille. Uphoff (note steam tractor)
Photo 3: Horstmeyer. Hille
Photo 4: Hille. Meyers (seed company? note: large barrels, crates and merchants)
Photo 5: Hille. Burmester (note: white wash chipping off stucco suggesting age)
Photo 6: Hille. Wilhelmy (note: farmhouse with stucco and barn with brick in fill framework construction)
Photo 7: Hille. Horstmeyer (note: muddied path with puddle)
Photo 8: Hille. Bormeyer (note: barn with whitewashed brick in fill and fruit trees planted alongside barn)
Siding: MBZ building kits are available from Reynauld’s in IL, they feature numerous rural buildings and farmsteads but purchasing can be delayed for many months due to small production never the less they maybe of interest to certain themed layouts.
Three lovely photographs of homes in the country include scenes with lush vegetation, walking paths, young and old trees. How to model such a dynamic landscape will require keen observing and patience. Plus the right materials and tools.
The Frye House by Archistories
is a good building to start with, add various colors and lengths of Noch Static Grass, trees and hedges but don’t forget to shape the topography. Unless you live in Iowa rarely is the land flat. Lighting a scene to replicate noon day sun is yet to be discovered when i have a solution I will surely post it. With the right light shadows will be soft and colors will be bright. Tissue paper could solve window treatments in the Frye House which features partition walls as a standard feature thereby allowing selective interior lighting. Walking paths, cemetery and fences are part and parcel of a well lived country side. Today it is possible to model all aspects of these three photographs but first comes planning and careful execution. One such tool that is expensive but worth owning is the Noch Staticmaster, it charges static grass thereby making it stand on end realistically. I got mine from ZScaleHobo.com. A Z scale steam engine taking a journey through such landscapes is the layout experience everyone will enjoy.
Photo1: Cantorhaus. Hille (choir leaders home next to cemetery and Christian marker)
What is placed near a railway crossing and station requires planning and expertise. The two photos I am including here are a station and a grade crossing. Hedges and trees line the platforms with numerous kiosks located near the glass roofed portico. Old fashion iron lanterns once offered by Marklin can be seen in the railyard. The grade crossing with arms raised include several people giving a strong impression of scale, grade crossing arms are comprised of tapered poles heavily weighted on end.
Photo 1: Deynhausen. Salzsaline
Photo 2: Minden, Bahnhof
1848 Minden Bahnhof today
Siding: figures by Preiser add interesting scale features and points of interest, consider placing figures near view of trains as MOW (maintenance of way workers), passengers waiting for a train, or simply walking figures along the tracks or frolicking on a day off.
Interesting note: Minden Bahnhof is located just blocks from Archistories headquarters in Hannover, Germany.
One of the great challenges for me is modeling realistic roads in Z scale. Before asphalt and cement roads were dirt, gravel, cobblestone pavers or brick. The likely road surface around 1900 in the country was dirt which varied greatly in color, width and smoothness.
The attached photographs give a glimpse of what a country road in a farming community would have looked like including cattle and horse dropping and the texture of wagon wheels in mud plus the occasional appearance of leaves blown against a wall.
Photo 1: Hille. Strasse
Photo 2: Hille. Strasse
Photo 3: Strasse. Apotheke (pharmacy presumably to the left)
Siding: Noch offers numerous choices for roadway construction including, gravel, cobblestone, and asphalt. Check out ZScaleHobo.com for these and other offerings from Noch.
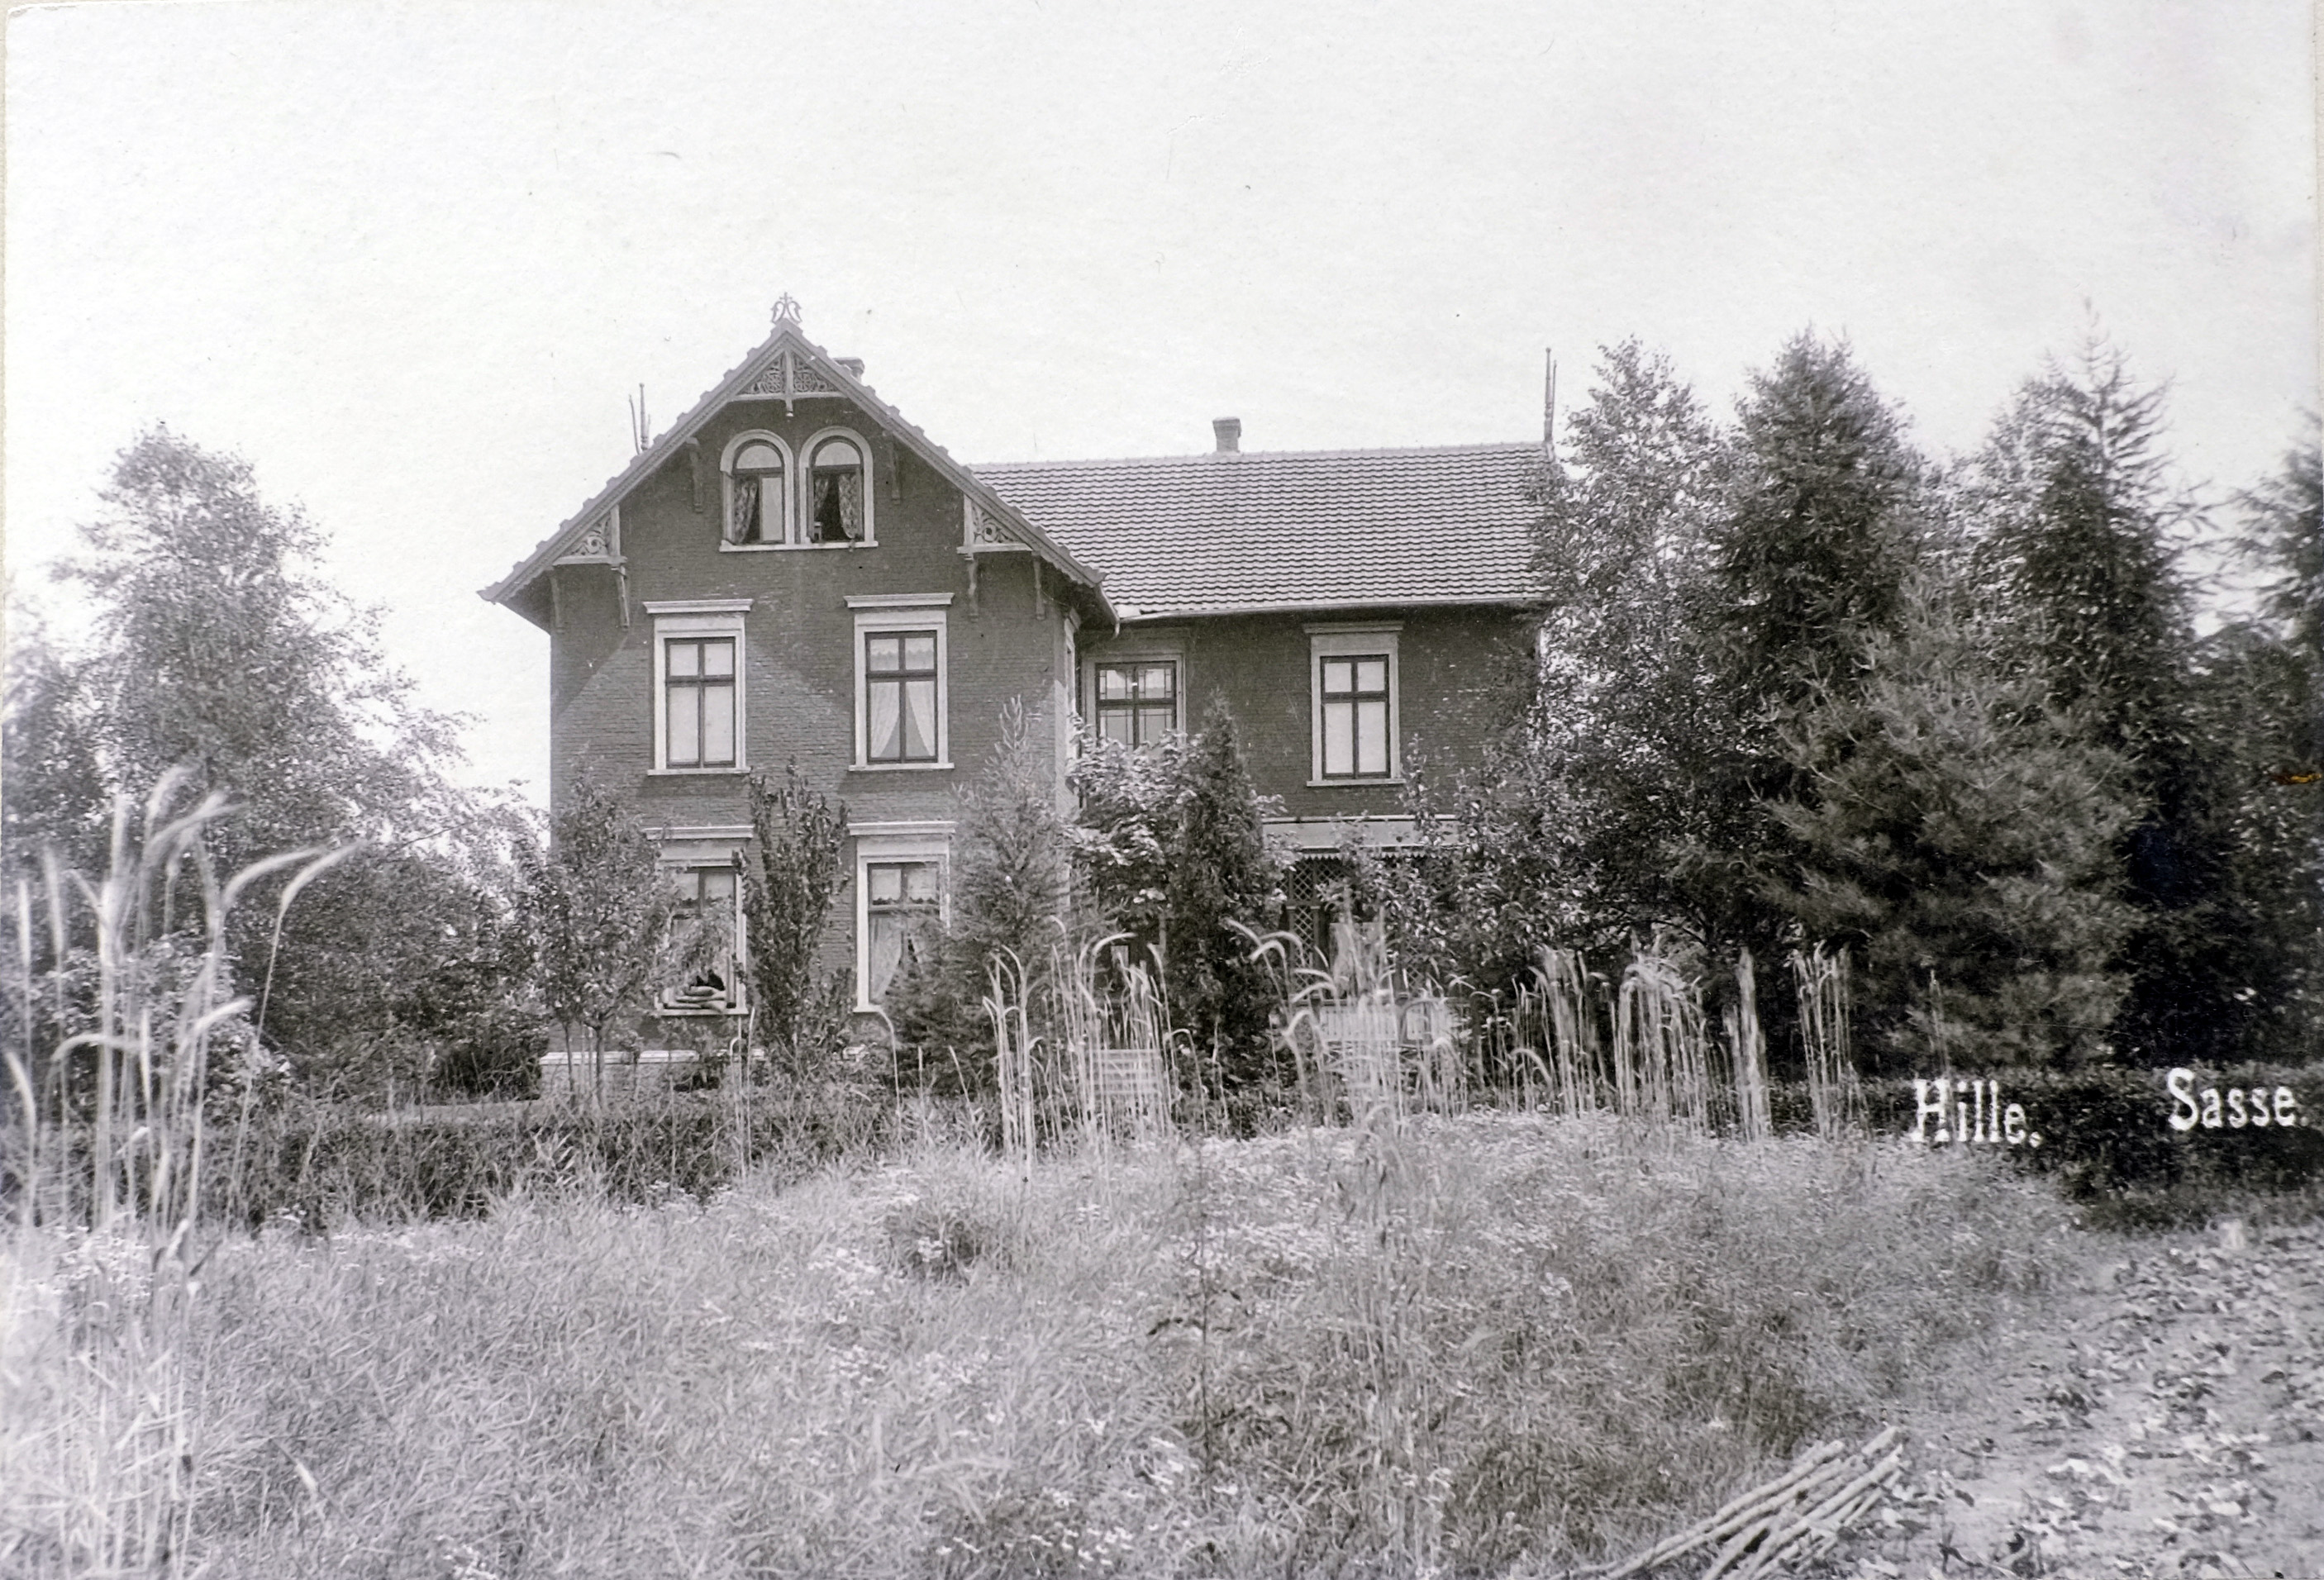
Photographs offer a vast array of ideas and insights into the past, and those touchstones may be a resource for modelers in Z. I recently purchased a collection of albumen photographs produced between 1890-1900 of various German subjects including railway scenes, town architecture and rural scenes that include farmsteads. If you model German railroading before reclassification these photographs maybe useful for ideas on scenery construction and scratch built buildings.
I will be featuring 22 photographs from this collection that appear to be made by the same photographer who used a 5×7 view camera with glass plates thereby insuring crisp detail. The precision of these photographs will be helpful in viewing fence types, tree types, road construction, topography, placement of buildings and the like. Each photograph is identified in the lower right corner, I will be researching these locations as much as possible, but consider for a moment that all appear to be taken in roughly the same region of Germany and most cases Hille, Germany which is situated west of Minden in Westphalia. Note: landscaping tends to look more overgrown than contemporary landscapes, in order to model this effect layers of landscaping materials need to layered in size and color.
Photo #1: Porta. Wittekindsburg built in 1896 (restaurant with people congregated along a sandstone fence)
Photo 2: Hille. Schule Witloge (school with excercise bars)
Photo 3: Molkerei (milk processing plant)
Photo 4: Hille. Pfarrhaus (parsonage)
Photo 5: Hille. Hartmann (goods store owned by Wilhelm Hartmann)
Siding: Archistories has released numerous wood and metal fences depicted in fine laser cut plus industrial smokestacks to further accessorize Z layouts.