MBZ laser-cut building kits in Z are comprised of an extensive line-up with particular focus on Bavarian architecture including rural dwellings and railway buildings.


Based on real architectural prototypes the kits offer modelers an historical basis for layout design; they can be used generally for layouts with countryside scenes or inspiration for rigorously suggesting the topography and features of Bavaria and its branch line railways.

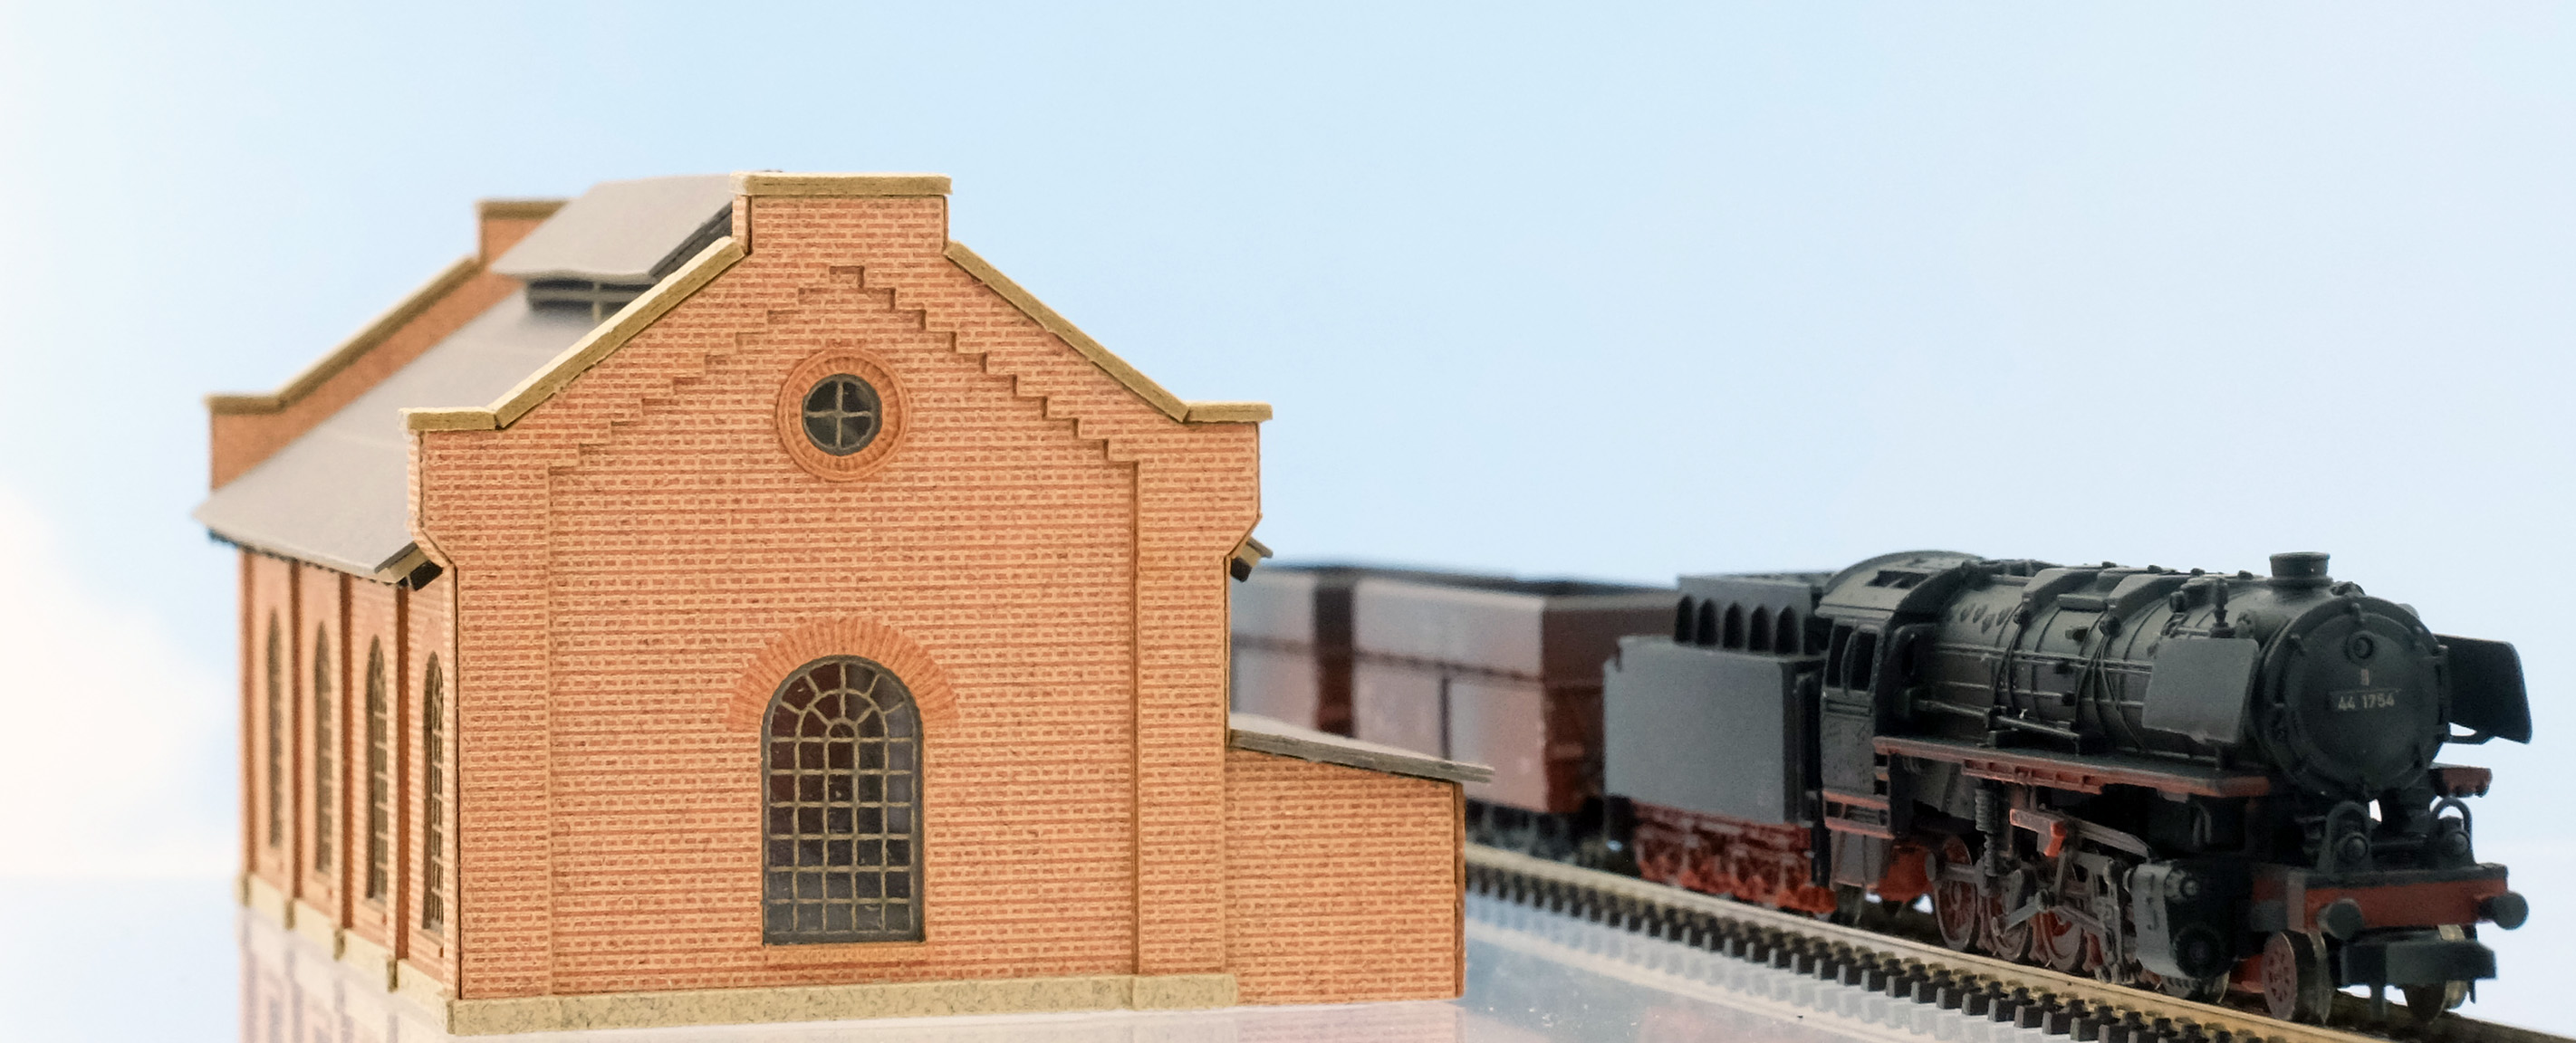
Included in this post is the Locomotive Shed Hofsteinach (MBZ Art.#16 057) Z gauge kit comprising two parts: administration building and attached 2 stall locomotive workshop. A late photograph I found for the prototype appears to show the building used late in life as a storage facility, evidence suggests it was not used with a turntable although a very simple one may have been employed at some point.

An introduction to these kits beyond historical perspective and including build quality leads to comparisons with other manufacturers of today’s laser-cut kits: Archistories and Faller. Each company has its own approach which is translated to each kit’s personality. Archistories kits are Prussian in basis and precision in nature from kit to completed building. Faller is rather more generic architecturally, and their kits sometimes could use a little more finishing, but the buildings are uniquely appointed with interior masking allowing nice details including curtains to be seen in buildings with interior lighting. MBZ kits have a personality uniquely their own, I have built close to 10 thus far, and each presented unique construction demands.

After opening an MBZ kit one will notice the uniform dark brown card-stock for the majority of parts, windows are separate fixtures on white cardboard. The card-stock is rather soft if compared with the card-stock used by Archistories, these parts also have carbon deposits left behind by the laser-cutting process: sometimes heavy. The kits also smell of burnt paper which is okay because it is rather subtle and one gets used to it. Large parts are also usually warped presumably due to the laser process. The downside to these kits are gluing, painting, and lightweight filigree parts such as trusses, but I hope to share my personal approach and help others build these kits satisfactorily because they are good kits.

Gluing: I use Noch 61104 glue because of its quick setting and flexible nature, it dries clear with a little gloss so don’t use it to fill gaps, gaps can be filled with brown tinted wood glue with better results. Before you glue to need to prep the parts to remove carbon deposits, manufacturer suggests sanding sponge or wire brush, but I use a paper towel and brush away the dust. Best use is made of gentle approach here. Note: youTube video posted by Reynaulds shows Thomas Oswald building one of his kits using UHU Hart glue which is an excellent glue but rather messy with strands that seem to pull away applicator after application.

Painting: MBZ kits are raw cardboard, they are not pre-tinted like Archistories and Faller thus painting is required. MBZ has a line of pigment paints which are applied with a sponge which are reasonably priced in kits, but I prefer using Gouache watercolor paints which I will ouline here. The first step is priming the parts before assembly and painting other parts before assembly. I use Gouache for several reasons: building up texture, quick drying, excellent color choices, and can be lightly sanded. Gouache is opaque watercolor which can be diluted with water for more transparency, it also mixes well with other colors. But as with certain other artist media Gouache needs to be protected by a final application of lacquer, I use acrylic lacquer applied with an airbrush. Lacquer comes in matte, semi-gloss and gloss, the choice for each is complicated by the fact that each will impart a different surface appearance but also and more importantly different levels of color saturation thus gloss will impart the colors with much more saturation than semi-gloss or matte. I also use the micro-crystalline wax by Renaissance which gives a waxy/gloss finish appropriate for textured surfaces, I don’t use it often but for those situations it is suitable there are no substitutes. Preparation for paint: first prime the parts thereby sealing the paper. Note: MBZ textured laser-cut parts for some reason resist paint, I found a drier paint (less water) was required, too much water in the paint pooled on top of the parts. I find MBZ kits to border on primitive, I embrace the soft edges of the paper parts and uneven color application therefore I have tended to use brush versus airbrush, it is a technique where I was able to control paint thickness and shading, but a combination of airbrush and brush should yield excellent results. With MBZ kits for me are about embracing buildings with age and years of history, I have found it better to push in the direction of defects than perfection with these kits thereby bringing to the surface years of use.
Very delicate filigree parts such as trusses are difficult to work with in MBZ kits, they are best to be glued to the roof panels before inserting into loco sheds as suggested by the manufacturers’ illustration which also serves as assembly instructions. Note: Instructions in the form of a short text accompanies a large illustration which I have found at times misleading and/or challenging to say the least, it is best practice to lay the parts out and try to understand fit and placement before gluing. Note: reread last note!
For each MBZ build kit I post now and later I will describe trouble spots with the kit in question and technique I used unique to that kit.

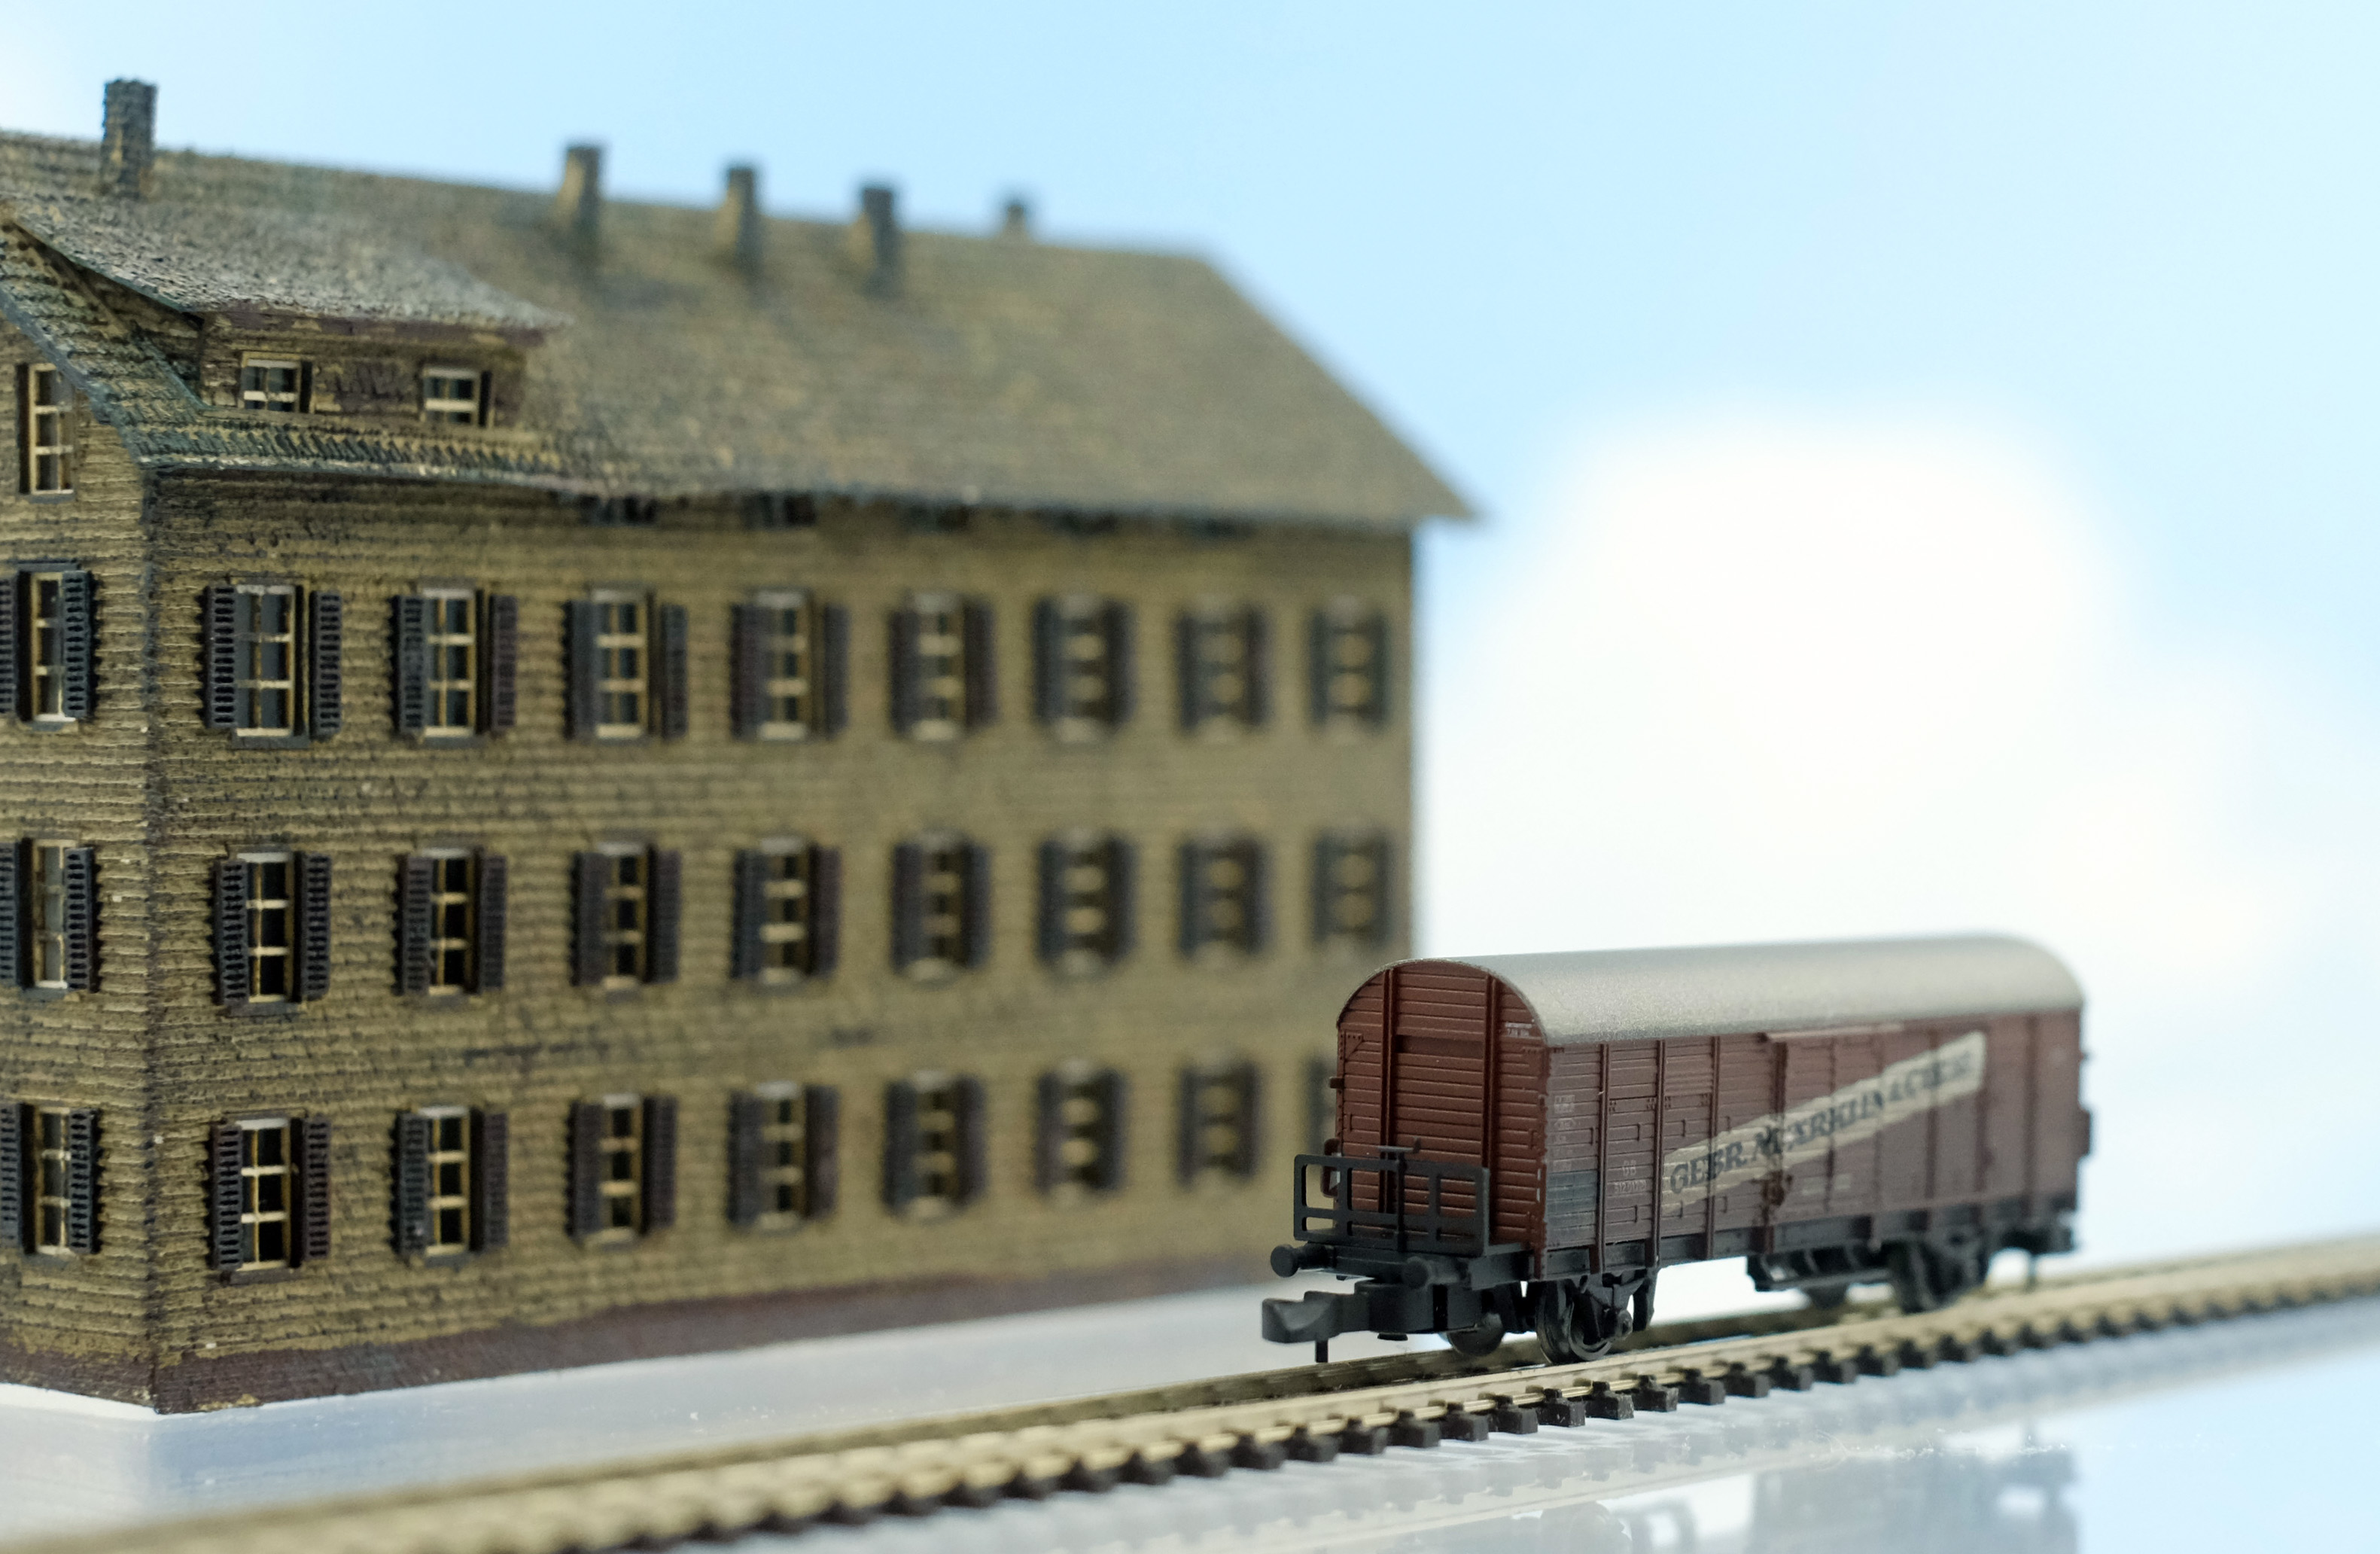
Loco Shed Hofsteinach: All in all a very good kit and equally nice building of medium size. Unique to the architecture of this building is scale, it looks much bigger than it really is which is a unique achievement praised in architecture. Construction of this prototype included brick infill siding with numerous windows framed in iron, stucco and shingle administration building. The kit included hinge design for the 4 large wood loco shed doors which involved super gluing a pin (nail) to the edge of each door panel, due to the thickness of the pin and securing the doors to it I chose to forgo working hinges and permanently glued the doors in place. Trusses are very nice in the kit, but they are very lightweight although prototypical in scale they are hard to work with, they should be glued to the roof panels before installing in building as suggested by the instruction’s illustration. Window panels are glued to the outside of the building’s framework and outer panels glued over top which is a little different from the other manufacturers.
I used the dry brush technique and build up color on the brick infill siding finishing with airbrushing a light spray of gray/black.

Door panels on loco shed were first stained with a brown stain followed by a wet brush of gouache with grimy black paint and finished with light airbrushing.

Roof panels were darkened with gray/black using airbrush. Note: manufacturer did not include smokestacks, but I will include those when the building goes to layout.

Adminstration building includes aged shingles and stucco. I came up with a color for the stucco I was happy with and added white charcoal powder for texture, this layer was followed by a slightly darker tone to suggest weathering, age and repairs.

Shingles were darkened with a light spray of gray/black. Foundations stones varied from one side to the next, I colored matched the administration building’s stone color for a uniform look around the building. Note: it is not uncommon for foundation stone color to vary depending on construction time-frame and changes made to original structure over time.
This very solid, designed and proportioned loco shed is a very good building for branch-line service.
Siding: only USA dealer for MBZ is Reynauld’s in Illinois.